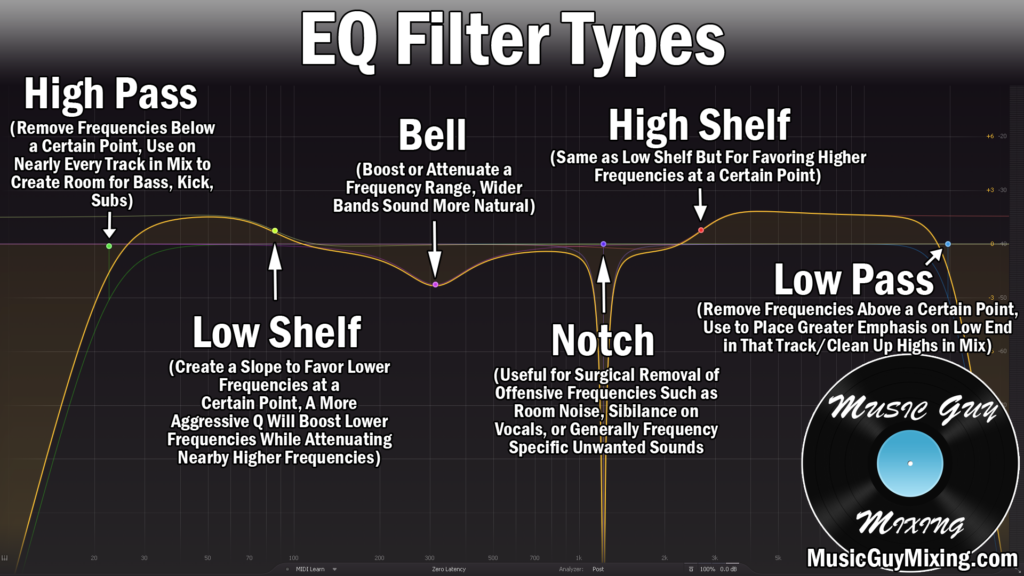
Whether you want more clarity from your vocal, more body or warmth, need to address sibilance, a lisp, a claustrophobic vocal, or just want a good sounding across the board vocal, these EQ presets for vocals can easily be dialed in to get professional results from your vocal in your next mix.
EQ Presets for Vocals

Let’s start out with effective general EQ presets for vocals before getting into specific goals or how to resolve certain issues you might have on your mix’s vocals.
Lead Vocal EQ
The most important vocal in your mix is the lead vocal itself. The star of your mix shouldn’t sacrifice anything for any other tracks in terms of frequency ranges. The only things we want to cut on our lead vocal are the parts which aren’t working.
Like virtually any track in my mix, I typically prefer cutting over boosting when it comes to the lead vocal. This allows me to remove what isn’t contributing to the overall sound which in turn props up what IS working which is itself the basis of subtractive EQ.
That said, small 1-2dB boosts can benefit your vocal from to time.
All that in mind, here are the EQ presets for vocals when talking about the lead itself – just a solid all around guide for sculpting a perfect sounding vocal:

High passing is always a good place to start with lead vocal EQ to roll off everything below the fundamental body of the voice. This helps to clean it up by getting rid of noise in every form that you don’t need on the vocal.
Note that the high pass filter point differs from vocalist to vocalist. I actually have specific male vocal EQ and female vocal EQ cheat sheets, but use this as a reminder that these are simply all general recommended ranges for each adjustment.
You can bring out some of the body in those fundamental frequencies and earliest overtones with a small boost around 200-300Hz or alternatively you can cut here if your vocal is a bit too boomy or muffled.
A dynamic cut around 500Hz helps to clean up some of the unflattering mud on your vocal, and as I’ll cover more in depth later, the 1-2kHz range can be adjusted to correct hollow or nasal vocals with a boost or cut, respectively.
A lead vocal should be up front in the mix, and aside from applying some up front vocal compression, small boosts to the 3-5kHz range and a small high shelf around 10kHz can help bring out the presence and transient punch of the vocal to keep it especially visible and responsive to the listener at all times.
Backing Vocal EQ
The next of these EQ presets for vocals focuses on backing vocal EQ. The goal here is to contrast with the lead vocal to give them and the lead vocal especially each their own space.
This can be accomplished with high and low pass filters at 300Hz and around 5.5kHz, respectively:

This will give the lead vocal all of the body in the mix, not to mention keep all of that transient bite and assertion on the lead vocal on that high end, as well.
Vocal Warmth
Let’s start to get into specific flavors for the vocal, nudging it in one direction or another, beginning with a recent one I did in covering how to bring out the warmth in your vocal by way of this vocal EQ preset:
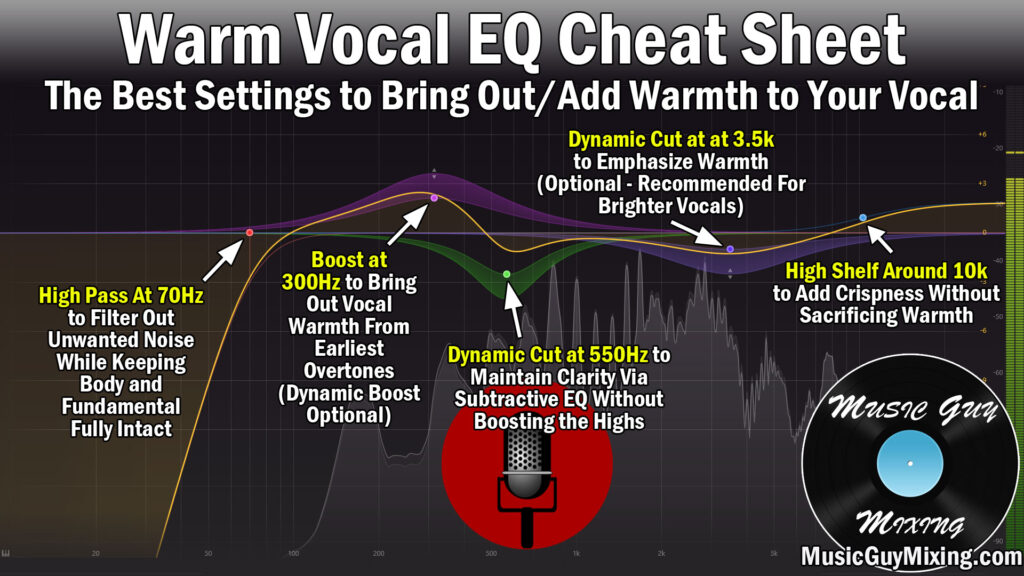
Sometimes you have an overly bright or thin vocal by virtue of the recording and need to add some of that low-mid and mid frequency warmth to balance it out.
This warm vocal EQ cheat sheet emphasizes those mids through boosts around 300Hz plus a dynamic cut around 3.5kHz.
It also optionally preserves more of that low end, plus keeps the clarity of the track with an otherwise innocuous high shelf at 10kHz, not to mention a dynamic cut to control the mud and create clarity by way of that subtractive EQ, as well.
EQ can’t always get you all the way there on its own, so check out my guide to vocal warmth for tips on how to work some saturation into your vocal to add warmth when the inherent warm frequencies aren’t in the recording.
Clarity
Speaking of clarity, sometimes you need to take a vocal which is too low and mid heavy and nudge it in the opposite direction by way of some vocal clarity EQ:

Here you can see we’re attenuating those low mids and mid range frequencies with a healthy cut across 200-650Hz or so, albeit spread out across a couple moves.
We can add some fullness back into the vocal to correct a hollow sound around 1.5kHz but more to the point boost around that 3.5kHz region for clarity and presence.
You need to be careful about boosting in the 3-5kHz region as this adds brightness but can make a vocal harsh if you get carried away (more on this in a moment).
Once again I like a high shelf at 10kHz to add some top end sizzle and crispness, a larger 3dB shelf in fact when I’m looking for some clarity.
Taming a Harsh Vocal
Let’s start getting into taking some contingencies into account to address a host of specific problems you might need to correct on your vocal with specific vocal EQ presets.
I just mentioned how that 3-5kHz region can lead to a harsh vocal. This is because human ears are sensitive in this region, and too much of a jump or emphasis on this frequency range can come off as grating.
This guide to EQing harsh vocals covers the high-mid and high frequencies which are most irritating:

I typically like dynamic EQ cuts so that you’re cutting in proportion or as the vocal needs it from one note to the next, especially when making corrective moves like this.
Part of what can lead to that grating sound on the higher end is an exaggeration of vocal sibilance, or the harsh and aggressive accentuation of certain sibilant sounds, particularly the “S” sound.
Treating Sibilance
If that specifically is the issue, you can use a special tool like a de-esser to correct it or even a multiband compressor as a de-esser to treat sibilance:
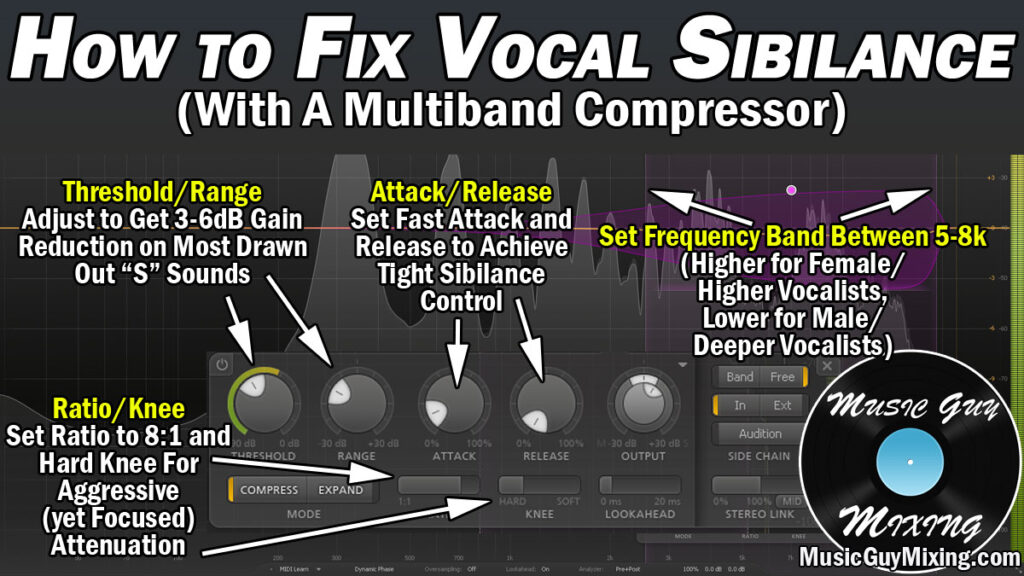
Seeing as this is about EQ presets for vocals, you can create a dynamic EQ band in that 5-10kHz range and set its threshold by your more egregious sibilant part of the vocal.
This ensures that it will be tame in attenuating throughout the rest of the vocal, keeping it relatively transparent while still addressing the sibilance as necessary.
Vocal Lisp
When we attenuate in the 5-10kHz region too much, perhaps in the context of treating sibilance, this can smooth out those sibilant consonant sounds to a fault to the point that it creates the effect of a lisp.
This is true even when the vocalist didn’t have one before; you can essentially engineer the vocalist into having a vocal lisp with too much de-essing, multiband compression, or dynamic EQ attenuation in that range.
We can fix a vocal lisp via EQ with a small boost around 7.5 to add clarity and sharpness to the sibilant sounds which have either been overly attenuated before or simply aren’t inherently in the vocal:

A 1-2 static boost works well with a relatively wide Q, though a dynamic boost can pick and choose the necessary notes and sounds if clarity isn’t an issue across the vocal.
Nasally Vocal Vs Hollow Vocal
I’ve referenced both of these a few times, but the 1-2kHz range can be adjusted to correct either a nasally or hollow vocal, albeit in either direction.
A hollow vocal specifically can be corrected by giving a little dynamic boost in that 1-2kHz region to add some fullness to the vocal:

A nasally vocal can be corrected in part by bringing this range down with a dynamic cut to ensure we don’t end up hollowing out the vocal, though additional moves can help to correct a nasally voice:

As you can see, this involves adding a little extra body and accounting for some of the overtones associated with a nasally voice approaching that 4kHz region.
Controlling Plosives
One last and easiest of the EQ presets for vocals involves smoothing out vocal plosives in the mix.
Plosives are those surges of air that you get with “P” sounds in particular, manifesting as booming pops on the microphone and in the mix, even with a pop screen in place.
The fundamental and near entire frequency profile of a plosive is at that 150Hz area, so a dynamic cut here can seriously help to smooth out their effect in the mix:
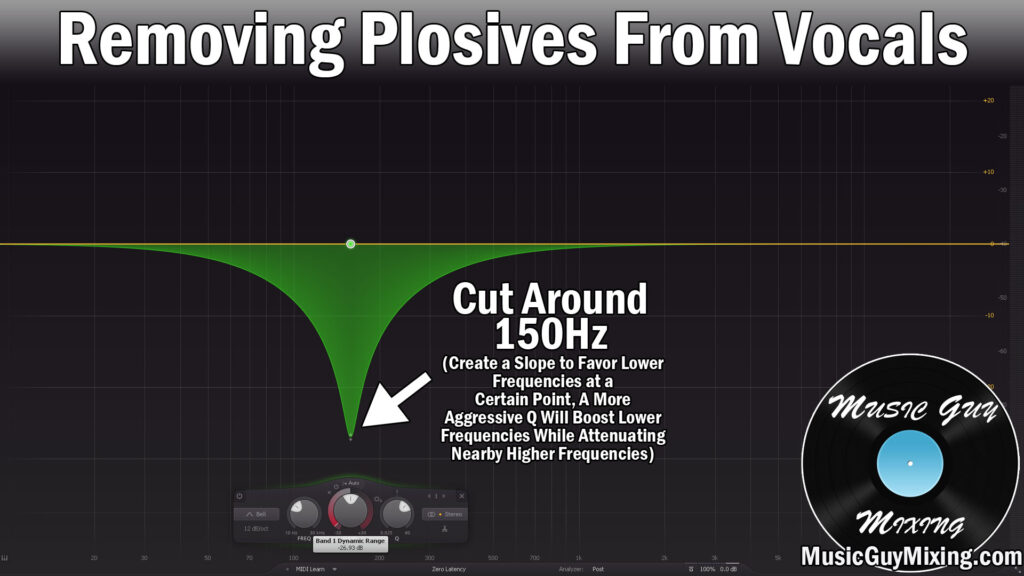
The goal shouldn’t be to eradicate the plosive altogether as you’ll almost certainly begin to cut from the body of the vocal. This is why a dynamic cut is perfect for plosives, targeting the worst plosive (similar to the sibilance earlier) and setting your dynamic band’s threshold accordingly to get the attenuation you want.
Again, just aim to smooth out its effect and make it a less noticeable in the mix as the vocal will be better for it.
Check out the vocals tutorials category for more tips, like genre specific vocal cheat sheets like my rap vocal EQ guide, and grab my complete EQ cheat sheet for fast and effective snapshot cheat sheets for EQing every single type of audio in your mix to get fast, professional results by way of EQ adjustments across your mix.