When it comes to compression, we talk a lot about threshold, ratio (see compressor ratio explained), and attack and release. The compressor knee usually gets overlooked, but this setting can drastically alter the effects of your compressor.
Sometimes you want to use a more gradual knee (soft knee compression), and other times you want a more drastic knee (hard knee compression).
Let’s talk about the compressor knee, what it does/how it affects your sound, and what kind of knee you want to set.
Compressor Knee Explained
The compressor knee relates to the threshold on your compressor.
As you likely already know, the threshold dictates at what level the signal needs to exceed before it begins being compressed.
Setting a threshold of -28 dB means that any signal which gets louder than that point will begin to be compressed.
If our audio peaked at -20 dB, that would mean that it’s exceeding the compressor by 8 dB (during its peaks), and that 8 dB would be compressed at the ratio we set (during its peaks).
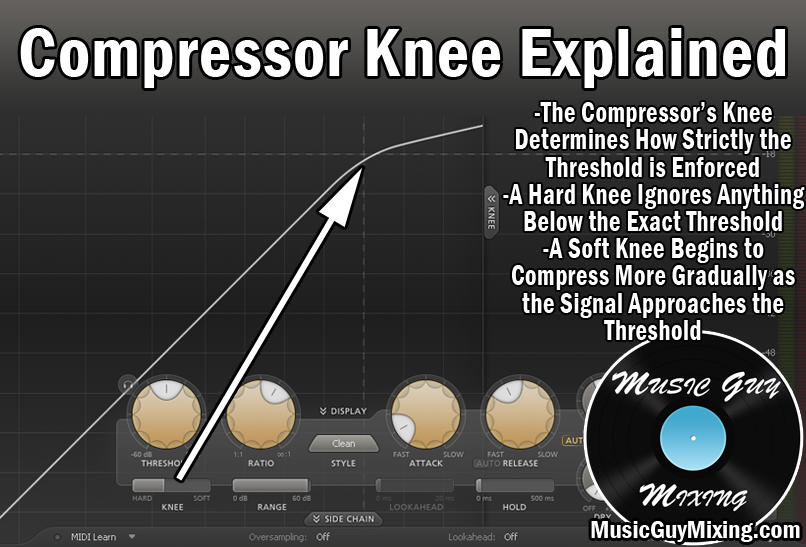
The compressor knee dictates how strictly that threshold is enforced.

We can adjust the knee to create a softer or harder threshold, making that threshold point more curved or a hard cutoff angle, respectively.
The best way to further explain how the compressor knee works and affects our audio is to compare the two different types: soft knee compression and hard knee compression.
Soft Knee Compression
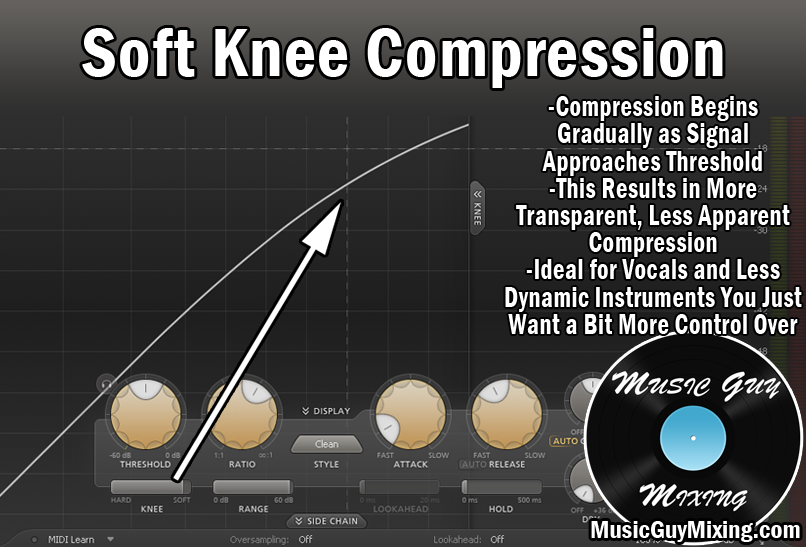
Soft knee compression uses a more relaxed threshold point. So while we’re still specifying the threshold, the compressor doesn’t wait until that has been reached to begin compressing.
Compression begins gradually (at a lower ratio) as the signal approaches the threshold. This floating ratio inches closer to the actual ratio you set as it gets closer to and crosses the threshold.
This results in a more natural and transparent compression where you’re not hearing the compression happening.

Soft knee compression is best on less dynamic instruments in your mix. These are tracks where you want more cohesion, but you don’t want to hear the compressor turning on and off.
You should use a soft knee on vocals in particular where you want control but don’t want to noticeably alter the audio or to hear the compression.
Hard Knee Compression
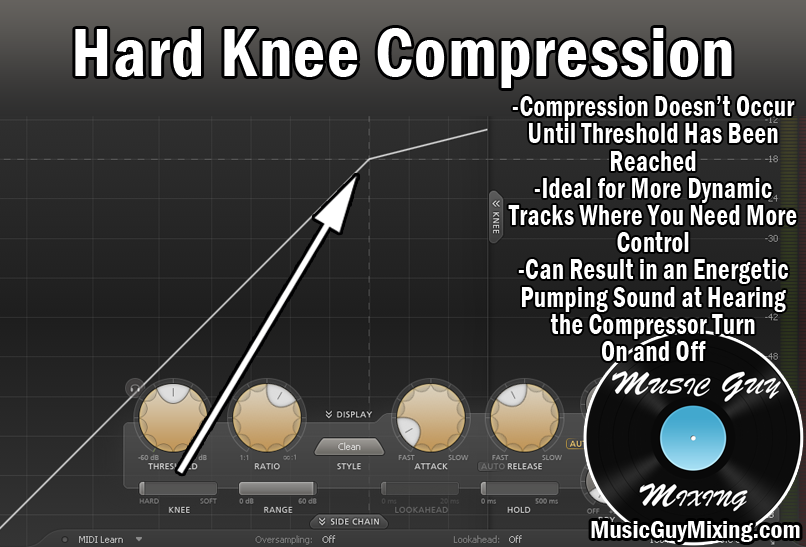
Hard knee compression involves using a strict cutoff point. There’s no range here; any audio which exceeds your precise threshold is compressed at the ratio you’ve set.

Hard knee compression is perfect when you want to completely tame and squish your signal, reducing the peaks immediately.
The most dynamic tracks in your mix will benefit from hard knee compression.
Really anytime you want that pumping sound, hard knee is the way to go.
So comparing the two, hypothetically let’s say we set our compressor’s ratio to 4:1, meaning every 4 dB which exceed our threshold will get reduced to 1dB.
Let’s also say we set our threshold to -20dB.
With a hard knee, we can have audio peaking at -21dB for example and it won’t be compressed. Anything -20dB or quieter will not be touched by the compressor because the hard knee is strictly enforcing that threshold.
Begin to soften the knee, and it’s a different story.
That audio which peaked at -21dB will now be compressed, just not to the full 4:1 ratio. The ratio at that point will be determined by the degree of the knee.
The softer the knee, the more audio below our threshold will be compressed and at greater ratios (still relative to our set ratio).
What to Set the Compressor Knee At
Generally speaking, the harder the knee, the more you’re likely to hear the compressor working. If you want a more transparent compression, go with a softer knee.
With vocals, you’ll likely want something softer. If the vocal is too dynamic, then you should spend time automating the level before it goes into the compressor. This takes more time, but it ensures that the compressor gets a more even level to work with.
This allows you to use a softer knee and overall less compression for a more natural sounding vocal.
Something more dynamic like acoustic guitar or bass you’ll want to go for a knee setting in the middle.
And with something like drums where the dynamics are all over the place, you might want to go with hard knee compression.
Just remember that the harder the compressor, the more you’ll typically hear it working, at least in combination with the ratio.
Compressor Knee Tips
- The compressor knee determines how strictly the threshold you set is enforced.
- A hard ratio fully adheres to your threshold. This means any signal below the threshold is ignored, and any signal above the threshold is compressed at your ratio.
- A soft ratio begins to gradually compress the signal at lower ratios before it reaches the threshold. As the signal approaches and exceeds the threshold, this floating ratio gets closer to and reaches the ratio you’ve set.
- A hard(er) knee results in more obvious and pumping compression. It’s ideal on the most dynamic tracks in your mix to control and tame those peaks such as drums or to a lesser extent bass.
- A soft(er) knee results in transparent compression that you won’t hear. It’s ideal on less dynamic tracks where you just want a bit more cohesion and presence such as vocals.
- Experiment on different knees for different tracks to hear the effects.

Pingback: Compressor Knee Vs Attack - How They Both Affect Compression - Music Guy Mixing
Pingback: How to Find the Perfect Compression on Vocals - Music Guy Mixing
Pingback: Audio Compressor Settings Chart - Where to Set Everything - Music Guy Mixing
Pingback: 7 Tips For Mixing Snare Drum for Better Results - Music Guy Mixing
Pingback: The Perfect Snare Compression Settings - Music Guy Mixing
Pingback: How to Use Compression on Bass - The Best Settings - Music Guy Mixing
Pingback: How to Use Compression on Acoustic Guitar - The Perfect Settings - Music Guy Mixing
Pingback: Piano Compression Guide - How to Compress Piano - Music Guy Mixing