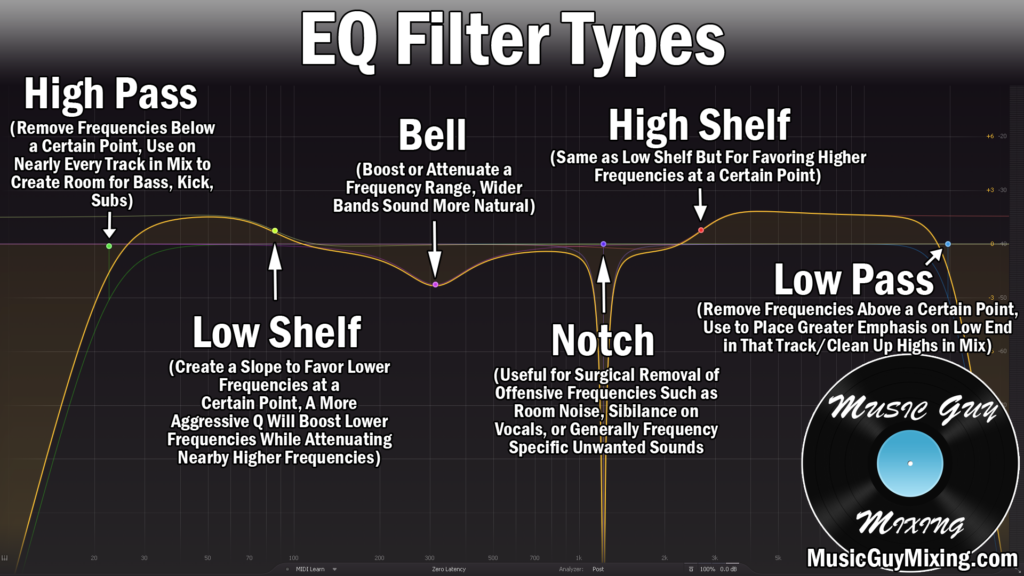
A Solid State Logic or “SSL vocal strip is a relatively streamlined way to EQ your vocals while also imparting a little analog sound to them. Let’s talk how to use an SSL to EQ your vocals with the best SSL vocal EQ settings to use in your next mix.
SSL Vocal EQ Settings
For this demonstration, I’m using the Waves G-EQ, a plugin which they designed in partnership with Solid State Logic themselves.
This is exclusively a semi-parametric EQ which benefits from a relative lack of choices as compared to a much more complicated and open-ended parametric EQ.
Here is a snapshot of my recommended settings, followed by an in depth analysis of each one and why I recommend what I do:
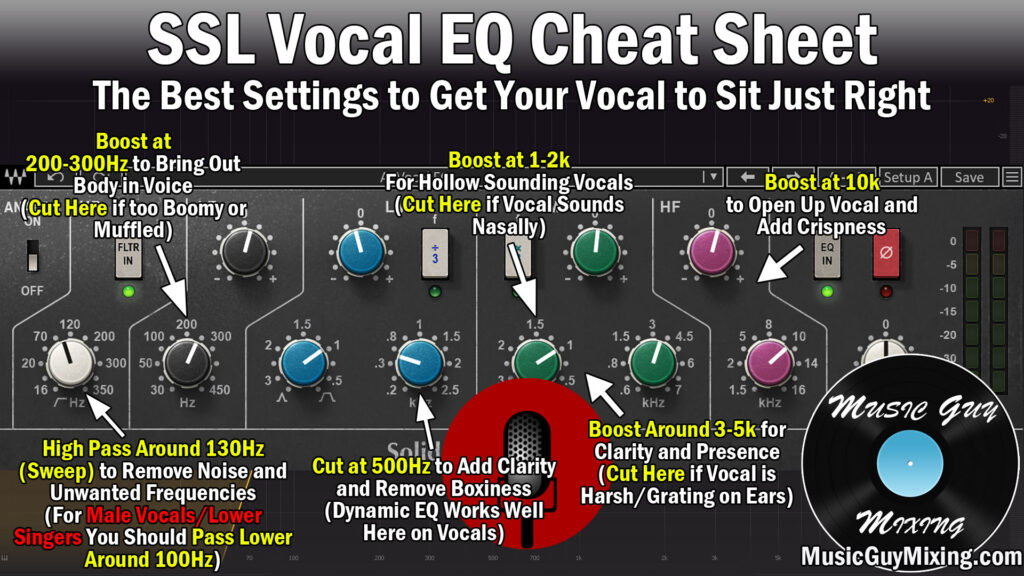
Moving left to right, we move up the frequency range of our audio which is our vocal, so let’s begin on the left in the “HP” section.
HP (High Pass)
“HP” stands for high pass, as in high pass filter – a filter which filters out everything BELOW a certain frequency which we set. This allows the higher frequencies of the vocal to pass through, hence the name.
The range on the Waves G-EQ for the high pass filter is 16Hz up to 350Hz with a “FLTR IN” button to engage or disengage the filter. When engaged, the high pass filter will remove every frequency BELOW whatever frequency we set this to.
When high passing vocals, you need to consider three things.
First, whether the vocalist is male or female. Male vocalists tend to have a lower bottom end of their range than female vocalists, but this doesn’t tell the whole story.
That’s why the second thing to consider is the type and range of the singer. A male bass or baritone singer’s vocal body is going to be much lower than a tenor, so that needs to be accounted for.
Lastly, we need to consider the vocal range of the song itself. Generally speaking, the higher we can filter without cutting into the lower end of the body, the cleaner that vocal will sound as we can remove more of the background and unmusical noise.
Generally speaking when high passing vocals, you can begin around 100Hz as a starting point, so turn the SSL vocal EQ’s high pass filter dial on the far left just left of the center of the dial to 100Hz. Now listen closely to the vocal on the lowest notes on repeat, sweeping up with that filter by 5Hz at a time until you hear that vocal audibly change. You’ll hear it begin to lose the fullness of that body and slightly thin out the higher you go.
Once you hear any kind of change, back the high pass filter dial back down by 10Hz or so to be safe.
LF (Low Filter)
The LF or low filter is our first proper band where we can cut or boost on our vocal. I like to use the low filter on an SSL vocal EQ to give the body of the vocal a bit more fullness with a small boost.
We just talked about high passing just below the beginning of the body of the vocal to remove background noise and clean up that vocal.
The body of most vocals lies in that 200-300Hz range, but like we covered in discussing high passing a moment ago, this is vocal dependent and will vary from voice to voice and with each performance.
Still, setting this dial (which ranges from 30-450Hz) to 250Hz around the 1 o’clock position is a good place to target.
To actually augment or attenuate the body and its impact on the vocal, we turn the gain dial which is slightly above it in that same section either right (for plus) or left (for minus).
We don’t want to boost too much and risk making that vocal undesirably boomy, so less is certainly more in this situation. Aim for a boost of 1-1.5dB, slightly turning that dial to the right.
If the vocal started out as being too boomy like in the case of the vocalist being too close to the microphone, a small attenuation in this same area can help.
If it’s an issue with plosive sounds, meaning those pop sounds you get from too much breath when delivering “P” consonants, dynamic EQ works best around 150Hz, so refer to my guide on how to remove plosives from your vocal for more information.
LMF (Low Mid Filter)
The LMF or low mid filter is for attenuating or boosting your vocal in that 200-2500Hz range.
I generally like to use this control to help create vocal clarity as mix mud builds up around the 400-600Hz range.
With that in mind, a cut at 500Hz of 1-2dB works nicely for creating that clarity without needing to boost the vocal higher up as much. As a general rule it’s best to cut out what’s not working from a vocal than boost something else to offset and compensate for it, and this cut effectively accomplishes that.
The additional parameter on the left refers to this band’s q setting, meaning how wide the cut is or how much of the surrounding frequencies you’re attenuating.
I like setting this on a lower number on this interface, turning it more to the right around the “1” position so that the slope on either side of the 500Hz center is a much wider, gentler grade.
As another general rule, you typically want to favor a wider Q rather than a tighter, surgical cut or boost which is more likely to introduce audio artifacts via the EQ. Wider adjustments always sound more natural as does more conservative adjustments in terms of gain one way or the other, hence pairing this 500Hz attenuation with a 1-2dB at most adjustment.
HMF (High Mid Filter)
Your high mid filter spans the largest range yet, 600-7000Hz.
You have a lot of options here, but it’s important to make your decision with the knowledge that you’ve also got one final band to make use of higher up.
With that in mind, I generally use the high mid filter to control the character of the vocal and specifically address one of two particular issues if present.
When a vocal is recorded in a less than ideal setting or the microphone was too far from the vocalist, you can get a hollow, empty sounding vocal. While you might supplement this with more body in the low frequency adjustment, I’m referring to a hollowness which can be controlled around 1k or so.
If you find that your vocal feels like it has a hole in that high mid frequency range, try boosting around 1200Hz by 1-2dB.
Over-boosting can either bring out a nasal quality in a vocal or give the impression of a nasal quality which was never there to begin with, hence the conservative 1-2d boost in that case.
If your vocal is sounding nasally in general, a small attenuation of 1-2dB can help smooth this out, but likewise, cutting too much can create a hollow sound.
Alternatively, if you don’t have either issue and want a bit more bite from your vocal, try boosting in the 4k region by 1-2dB. If it’s too harsh, you might try attenuating by as much in the same spot to help smooth it out.
So, as you can tell, the high mid filter is arguably the most open ended in terms of what you should do here. The best course is to listen to your vocal and decide if it suffers from any of the above issues and adjust accordingly.
HF (High Filter)
A small boost around 10kHz is a great way to bring out some of that crispness that you get with a bit of vocal air.
This doesn’t run the risk of introducing any harshness like the upper end of the high mid frequencies can, and it helps to open up the vocal ever so slightly for the better, helping to keep it in front of the mix by way of bringing out a bit more of that transient punch of the consonants, as well.
SSL Vocal EQ Tips
- High pass your vocal via the high pass filter on your SSL vocal EQ around 100Hz and sweep up until you hear the vocal change, then back it down by 10Hz or so.
- Boost the body around 250Hz with 1-2 additional decibels of gain to add fullness.
- Cut at 500Hz by 1-2dB with a wide <1 Q setting.
- Adjust 1200Hz if necessary by 1-2dB with the HMF, boosting to correct a hollow vocal or cutting to correct a nasal vocal.
- Alternatively, adjust 4kHz if necessary by ~1dB with the HMF, boosting to add clarity and bite or cutting to smooth out a harsh vocal.
- Boost around 10kHz by 1-2dB to open up the vocal, adding crispness as well as transient punch on consonants to help the vocal maintain its priority and visibility in the mix.