
Audio effects are used in audio mixing in order to achieve virtually any result you want in a specific track or the overall mix. Having a fundamental understanding of the most commonly used audio effects can help you get your audio where you want it faster.
In this overview, we’re going to break down the most commonly used audio effects and explain what each does and when you’ll want to use them. It’s audio effects explained simply and effectively.
Audio Effects Explained
We’ll start with the most commonly used audio effects and work backwards.
Equalization/EQ
Equalization is a simple yet useful audio effect which gives you precision control over the various frequencies which make up a clip of audio.

The EQ audio effect is used to boost or reduce a particular frequency range in a clip of audio.
Every single sound is made up of frequencies high and/or low measured in hertz (Hz). An EQ can bring out more or less of these frequencies to significantly shape the sound.
You can use an EQ to improve the quality of a clip of sound, or you can also use it to achieve some unique aesthetic effects with your audio.
You can make the argument that EQ is the most important audio effect because it’s arguably the only one you need to use on every single track in your mix.
There are many different types of EQ which all approach frequency sculpting in different ways or give you more or less control over your audio.
When to Use EQ
A lot of problems in a mix can be resolved typically by cutting frequencies out of clips.
If a track is too muddy, you can make a cut in the low-mid frequency range with an EQ.
Adjust the “Q” setting, meaning how wide the cut is and adjust the amount you’re cutting. Then sweep left and right in that frequency range while listening to the changes.
The aim is to make it sound clean without making it sound thin. If it sounds thin, dial back how much you’ve cut.
Alternatively, a cut in the higher frequencies can smooth out a track which sounds harsh on the ears.
I mentioned using EQ on every track in your mix. If no cuts are necessary in the heart of the audio itself, you can still set it to roll off the lower frequencies.
Setting a high pass filter around 100hz can remove quiet low rumbling frequencies you can’t even hear on tracks/audio that doesn’t need it.
Left unattenuated, these low frequencies add up over dozens of tracks and create noise and or mud.
Even if you can’t hear them, they’ll still take away from the headroom you have to work with.
In other words, leaving unnecessary frequencies on tracks means you won’t be able to get your mixes as loud as professional mixes.
There are limitless uses of EQ, and a lot of specific applications depending on the instrument.
Grab my free EQ cheat sheet for a quick, easy to reference graphic for every tips on how to treat every single frequency range for every single instrument in your mix via EQ.
What is the Best EQ
Arguably my favorite plugin in general, EQ or otherwise, is the FabFilter Pro-Q EQ. It’s the first plugin I recommend everyone have in their mixing toolbelt because of how versatile and useful it is for sculpting your audio to get the results you want every time.

I don’t do a lot of reviews on here, but I did do a FabFilter Pro-Q 3 review, so that should say something.
Compression
The compression audio effect allows you to get a more consistent level out of your audio.

It achieves this by lowering and smoothing out the loudest parts or peaks of a clip of audio. This sacrifices the dynamic range of that clip for a more consistent level which brings more energy to that audio.
Note that this is conventionally how compressors work. While it’s not used nearly as often, upward compression also exists and works by bringing up the quieter parts without affecting the peaks.
Dynamic range in audio, meaning the difference between the quietest and loudest levels, is important.
It sounds more natural and helps to keep your listener engaged. Without dynamic range, your listener’s ear will quickly lose interest in your mix.
Too much dynamic range can make a clip of audio sound erratic or weak which is why compressors are useful.
On a micro level, individual tracks can be hard to hear or too loud by comparison with too much dynamic range.
On a macro level, the mix will sound inconsistent and all over the place.
When to Use Compression
The answer is basically you should always use compression because your tracks will practically always benefit from it.
Whether you need to reign in a track which is all over the place or just want a bit more glue, compression can deliver.
Of course compression is very useful on overly dynamic instruments like bass (see how to compress bass guitar), acoustic guitar (see how to use compression on acoustic guitar), and even vocals (see the best compressor settings on vocals).
Even the best singers cannot consistently sing at the same level when recording a take.
A compressor is often added to the recorded vocal part to achieve a more cohesive and powerful sounding take.
Just like with EQ, compression has a huge range of specific uses on different instruments.
Note that there are a number of different types of audio compressors which all work differently and are more appropriate for different applications.
Check out my audio compressor settings chart to show you where to adjust each setting on your compressor to in order to get the most out of your audio.
What is the Best Compressor
This one is more subjective, but the FabFilter Pro-C is a truly excellent all around compressor for virtually any compression job you have.

It also has a number of “style” modes built in which it uses to model and emulate the aforementioned/linked to different types of audio compressors.
Multiband Compression
Multiband compression is a slightly more granular type of compression which allows you to compress different frequency ranges at different rates.

For instance, if you want to attenuate the peaks without affecting the bassier frequencies on a track, you can split the audio into two different bands, only compressing the frequency range you want as you want.
When to Use Multiband Compression
Multiband compression is great on a more macro level. It’s useful in the mastering stage when you don’t have individual tracks to give each frequency range a few last minute tweaks.
It’s also useful on an individual track level like for taming sibilance on vocals. A de-esser, an effect which is commonly used to attenuate vocal sibilance, is essentially just a multiband compressor which specializes in treating upper-mid and upper frequencies.
What is the Best Multiband Compressor
Once again I have to go with FabFilter’s Pro-MB as it has all of the bells and whistles of the Pro-C but gives you that granular control over specific frequency bands.
Gate
A gate is an effect which essentially mutes a track until its volume reaches a particular threshold.

This is useful for keeping your mix cleaner by effectively cutting out relatively quiet ambient or electrical noise from your recorded tracks.
When to Use a Gate
Dropping a gate on any audio (non midi) tracks in your mix and setting a relatively low threshold can save you from having to trim your audio clips, saving you time.
So rather than having to go track by track, cutting out all the times a microphone was recording but not receiving information from the source, you’d just set a gate with its threshold just above the noise floor.
The gate is open when the source is playing, then closes back up when it’s not, muting the air conditioning or electrical buzz.
It’s especially useful on vocals for this reason. Check out my noise gate settings for vocals.
You can also use a gate for some interesting aesthetic effects, like gated reverb.
What is the Best Gate
You don’t need a lot of bells and whistles for your noise gate.
Whatever stock gate your DAW has will do the job just fine. Just because FabFilter does all of the basic types of audio effects well, I’ll recommend their FabFilter Pro-G.
Limiter
A limiter is simply a type of extreme compression. One of the basic settings on a compressor is its ratio.
The compressor’s ratio dictates to what degree the audio which passes the compressor’s threshold is attenuated:

The ratio is represented in terms of every X dB over the threshold gets reduced to 1dB.
A 4:1 ratio means every 4dB over the threshold will get reduced to 1dB.
So if 12dB of our audio exceed the threshold for our compressor for a given track, at a 4:1 ratio, that 12dB becomes 3dB. Math!
If we crank up this ratio, virtually any amount of decibels which exceed the ratio will get output to the same thing.
For instance, at a 100:1 ratio, if we exceed the threshold by 5, 10, or even 20dB, they all get attenuated to virtually the same output because of that extreme degree of attenuation.
This is what a limiter does, essentially enforcing a ceiling on your audio.

When to Use a Limiter
A limiter is useful when you want to keep something from going over a certain level.
With that in mind, it’s useful for preventing clipping when you’ve got a really hot signal, or if you just want to turn up a track to get it as loud as possible without clipping, a limiter will do the trick.
In case you were wondering the difference between the maximizer vs limiter, they’re basically the same thing. Just a bit of branding, but most modern plugins marketed as either a limiter or maximizer have nearly identical settings.
What is the Best Limiter
Because a limiter is basically just a compressor with an extreme or infinite ratio, your compressor can work just fine as a limiter.
Since I referenced a few of their other basic audio effects, I’ll mention FabFilter’s Pro-L as a good option.
Delay
Delay creates a replica of audio which can be played at different intervals after the original, hence the name.
Delay is used to simulate width in whatever audio it’s used on.
Because the audio takes up more left to right stereo width, it sounds bigger than it did going in.
We can also use a delay to simulate some depth by filtering out the higher frequencies. This gives that delay the effect that it’s coming from farther away, deeper down the z-axis of our mix.
When to Use Delay
Delay is useful for achieving many aesthetic effects, but typically it’s just great for adding size to a track which is lacking.
Using delay on vocals is an easy way to emphasize or enhance an otherwise drab vocal part.
A shorter delay will thicken the vocal whereas a longer delay (meaning it plays later after the original part) will make it sound bigger.
Incidentally, I like to use two unique delays on my vocals (each on an aux/return track). A shorter one for that width and a longer one for more character.
I go into a lot more detail in my overview on vocals delay.
What is the Best Delay
Again, this is all subjective but I really like Soundtoys’ EchoBoy for its ability to not only nail any timing, size, and mode I want to throw at it, but it has so many options for coloring the delays to fit any vibe you’re going for.
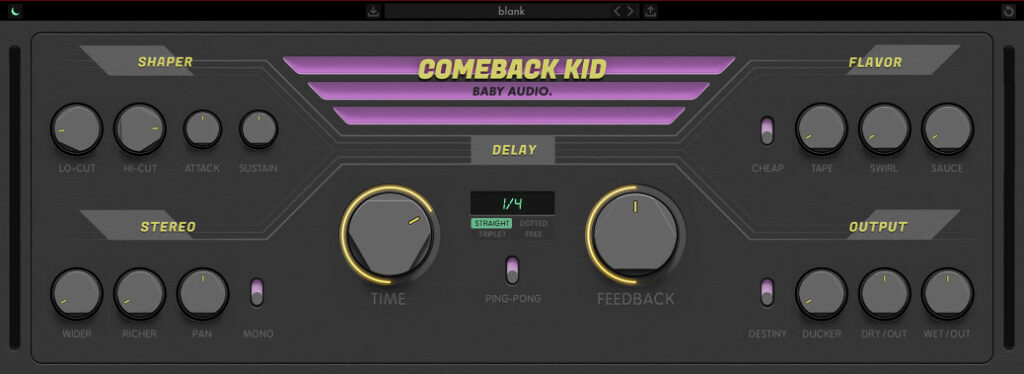
I also want to give an honorable mention to Baby Audio’s Comeback Kid for also having a lot of features for coloring your delays, not to mention a built in ducking feature to get out of the way of the lead vocal. It’s a kind of built in sidechain compression to make it easy to keep your lead especially clean and fill out the space in the gaps.
Reverb
A good mix is like a puzzle piece which fits together just right.
In mixing terms, the “canvas” which the puzzle fits into is made up of frequencies and space (both left and right and degrees of depth).
Panning and delay (the latter which we just discussed) relates to spacing and width, respectively, in the stereo field. But they both largely relate to the front of the stereo field.
To really create a third dimension to our stereo field, its z-axis, we need to simulate depth.
Enter reverb.

Reverb simulates the sound of audio in different sized spaces.
When you hear any sound, part of what you’re hearing is the reflection of that audio bouncing off (reverberating) of walls or objects in that space around you.
This is why the exact same audio will sound different depending on where you hear it.
In the old days, musicians and recording engineers had to create reverb-like depth organically, setting up microphones farther away from the instruments themselves or finding spots in rooms where the audio bounced around in a pleasing way.
Today you simply load up a reverb plugin and drop it on your track to simulate that your audio was recorded in a larger room than it was.
When to Use Reverb
If your mix feels too cluttered, you can open things up by dropping a reverb on a track(s) and pushing them deeper into back of the stereo field.
Additionally, using a uniform reverb room size setting on a mix can give all of the tracks a sense of cohesion like they were all recorded in the same (simulated) space.
Reverb is arguably the most fun audio effect to use because of the interesting effects you can get just by dropping a reverb effect on a track.
The problem is that a mix can just as quickly get cluttered or muddy once again if too much reverb is used. This is why you should EQ your reverb using the Abbey Road Reverb Trick.
And like with the delays, I like to use two unique reverbs as aux/return tracks in my mix.
Modulation
Modulation involves introducing an LFO, or low frequency oscillation (see what is an LFO for more information), to one or more parameters of your audio.
This modifies it in real time to keep that parameter evolving, achieving a number of interesting effects.
Modulation is the kind of parent category for a number of different audio effects which all affect different parameters via an LFO. Let’s take a look at a few of them.
Chorus
As I explained in my overview of what is chorus, chorus is an effect achieved by creating a duplicate of your signal and using an LFO to modulate the timing and pitch.
Varying the timing and pitch of your signal tricks the ear into perceiving it as being unique which simulates thickness and, when spread out, a natural width in your track.
It works especially well on guitar and vocals/backing vocals, the latter of which when blended in via an aux/return track.
Phaser
A phaser also uses an LFO, in this case to modulate peaks and troughs through the frequency spectrum. This creates a smooth evolution between alternating favoring higher and lower frequencies.
At slower rates you get a washy effect over your audio. Turn up the speed and it sounds choppy and the audio itself sounds faster.
A phaser is a popular effect to use on guitar to give it a washy or choppy effective in accordance to the rate as I just mentioned.
On a more macro mix level, you hear phasers used a lot to create an interesting filtered aesthetic effect. This makes for a nice contrast to set up another part or as a bridge between two parts.
Tremolo
The tremolo effect uses an LFO to modulate volume up and down. As the volume quickly and responsively goes in and out on the track, you get a cool choppy effect, but that’s literally all it’s doing.
The speed on the tremolo can be adjusted to nicely match the BPM of your song. Green Day’s “Boulevard of Broken Dreams” famously uses a tremolo on the guitar to achieve that effect.
Flanger
A flanger creates a duplicate of your signal and delays it slightly while varying the timing via an LFO.
As the signals go in and out of phase, you get intermittent phase cancellation and sweeping comb filtering effects, resulting in a similar sound to the phaser (minus the frequency modulation). Similar to the phase, you can use this for interesting aesthetic effects.
The beginning of Blink 182’s “Feeling This” has flanging on the drums, giving them an evolving and distant sound until they come in harder as the effect is removed for the verse.
My amp and effects simulator of choice is Guitar Rig from Native Instruments and I apply its modulation effects on a number of different types of tracks and instruments in my mix in addition to guitar.
Harmonics
Harmonics refer to adding energy to your existing waveforms in order to create or develop overtones, thus augmenting the sound. A number of effects fall under the umbrella of harmonics, including saturation, distortion, and overdrive.
As I covered in my overview of what is an oscillator in music, the most basic waveform is the sine wave. It’s a smooth, round tone which represents a frequency based on its cycles per second (as I covered in the parts of a sound wave).
The sine wave’s simple shape and sound make for a good example to demonstrate what harmonics effects do.
Unlike other wave form shapes, a sine wave only exists at its one fundamental frequency. There are no overtones, meaning no frequencies at higher resonant frequencies of that sine wave.
Take a sine wave at 440Hz which is the key of A. Normally you’d have overtones at 880Hz, 1760Hz, and so on, but a sine wave only vibrates/exists at 440Hz.
If we add a saturation effect to a basic sine wave, we’re adding energy to the peaks. This deviates from its perfectly round shape and creates overtones at the next octave and beyond.
That’s the scientific explanation behind harmonics. The result is the change in color to the sound, the results of which depending on how much energy we’re adding.
Whether we talk about saturation, distortion, or overdrive, we’re generally referring to the degree of the harmonics we’re adding. Out of that list, saturation has the more transparent effect on the sound versus overdrive which is more on the crunchy distorted end that we understandably associated with guitar amplifiers.
We’re adding so much energy on the overdrive end of the spectrum that the wave form peaks are distorting. This sounds like a bad thing, but used in the right context this can add to our track or mix as a whole.
It’s commonplace to add a bit of light harmonic information via saturation in the mastering stage. When we’re referring to imparting a warmer, subtle harmonic sense to the audio, we’re talking saturation.
Speaking of mastering, we also have “Exciters” which is more about adding harmonics to the higher frequencies to produce a very particular kind of energy which sounds brighter and can give the illusion of a crisper mix.
As you can probably tell, there’s a lot going on with harmonics. There’s guitar style distortion, overdrive, and even saturation in the form of pedals, or we can find these kinds of effects as part of a mastering tool like Izotope’s Ozone.
There you are, the most commonly types of audio effects explained and broken down.
Just do a search on this site for any one of them to find helpful articles and resources on how to use them in your mix to get more professional results at home, in the box!


Pingback: What is an LFO - How It Will Save Your Mix - Music Guy Mixing
Pingback: What is a Noise Gate and How to Use One - Music Guy Mixing
Pingback: Gain Vs Trim - What's the Difference? - Music Guy Mixing
Pingback: Tremolo Effect - What it Is and How to Use it in Mixing - Music Guy Mixing
Pingback: Chorus Reverb Delay - How They Differ and Which to Use - Music Guy Mixing
Pingback: What is An Exciter - How Does an Exciter Work - Music Guy Mixing
Pingback: What Does Saturation Do and How to Use It - Music Guy Mixing
Pingback: Mixing Vs Mastering - What's the Difference in Audio Production - Music Guy Mixing