
Clean vocals are one of the nonnegotiables of a professional sounding mix. From recording to mixing, let’s talk how to get clean vocals in your mix.
How to get Clean Vocals

First and most obviously, recording clean vocals means less work to get them clean in the mix.
This means:
- Using the best microphone for vocals like the Rode NT2-A which is nicely balanced for body and clarity.
- Recording in a small and ideally sound proofed room to minimize reflections.
- Mitigating as much background noise (computer fan, air conditioner, etc.) as possible.
- Staying consistently in front of the microphone roughly 6 inches away at all times.
- Using a pop screen to catch plosives or attenuate their effects.
Of course we can’t control many of these factors. In many cases the microphone we can afford is the one we have, the room we record in is the only one we have, and ambient sound is what it is. Other times we’re working with audio which has already been recorded so it’s all a moot point. With that in mind, let’s cover some tips on mixing clean vocals.
Mixing Clean Vocals
As always, the better you can accurately hear your mix, the better it will sound and that extends to getting clean vocals.
This means mixing in an ideal space (see where to mix music). Some of this like means mitigating outside noise as well as sound treating your room, if possible, similar to recording in the best spot:
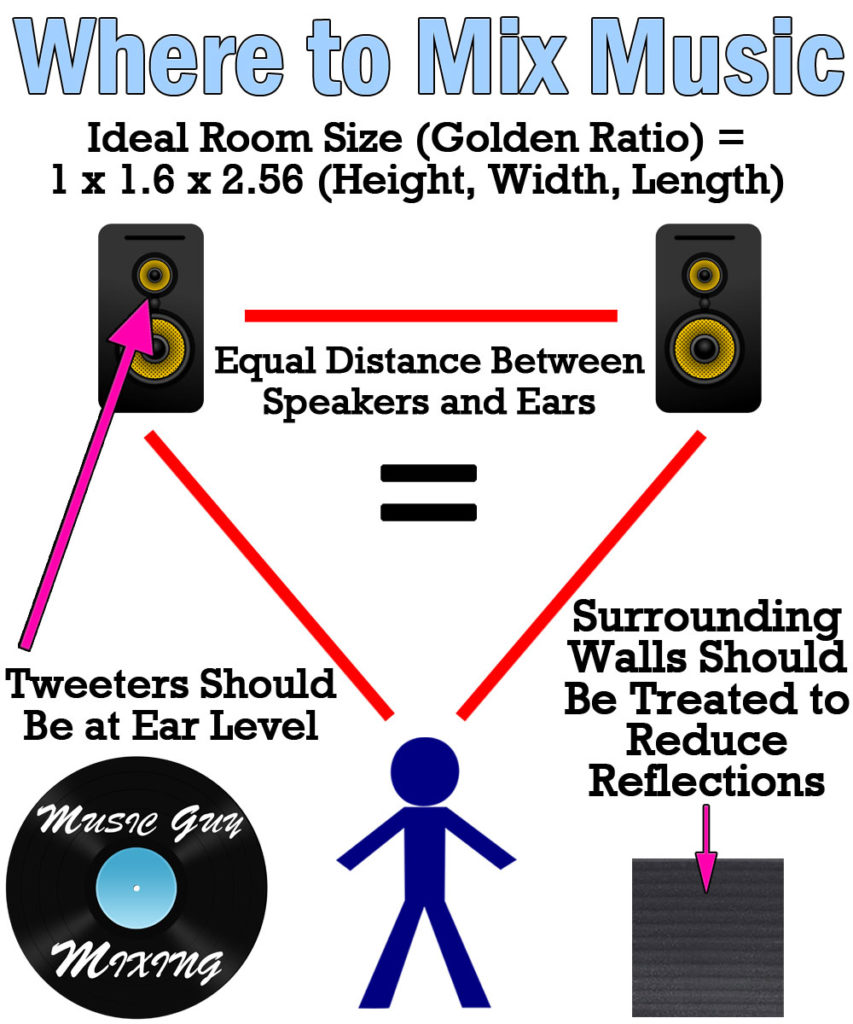
Other factors shown above include the ideal size or ratio of the room you’re mixing it itself along with sitting between your speakers/monitors with equal distance between you and one speaker to the other.
Also essential in getting clean vocals is having reference tracks on hand you can bounce back and forth to with hot keys. Specifically use a mix in which you already like the sound of the vocals and find them to be clean, in other words the sound that you’re chasing in your mix. This is essential to keeping you dialed into and focused on the sound you’re after.
Clean Vocal EQ
One of the first plugins in our vocal chain, EQ goes a very long way in creating clean vocals. This allows us to boost what is working but just as importantly cut out what isn’t working to prop up the remaining frequencies.
Specifically for clean vocals, look no further than my vocal clarity EQ cheat sheet:

High Pass at 100Hz (Male) or 130Hz (Female)
Open up your clean vocal EQ moves with a 100Hz or 130Hz high pass filter for male or female vocals, respectively.
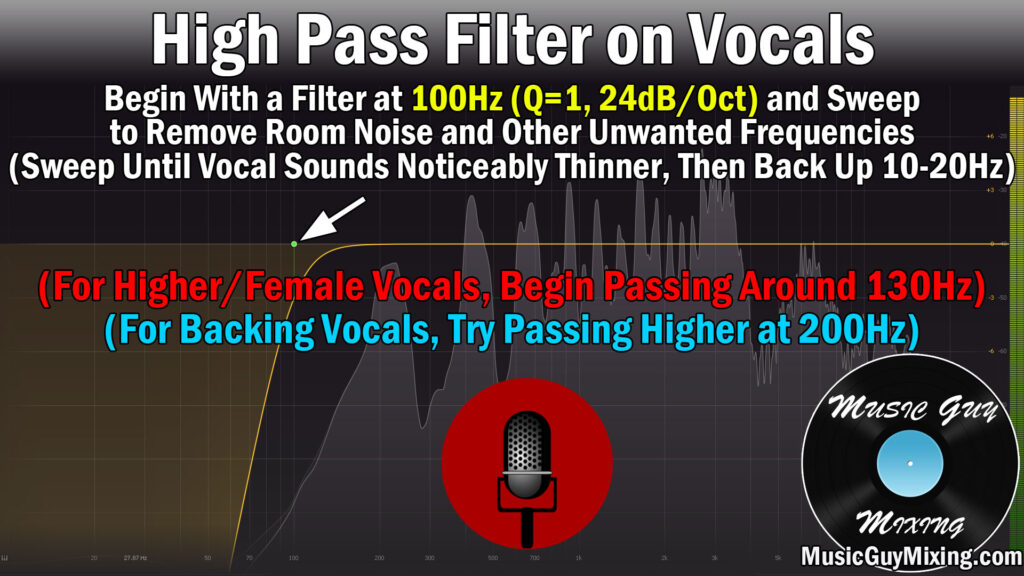
Not only does this create space for the low end instruments which need this space and ultimately benefit your entire mix, this actually helps to clean up your vocal by removing some of those ambient sounds I mentioned before.
The hum of central air, your computer fan, even the sound of cars passing by outside can all be addressed with a high pass filter and without removing any body on the vocal.
Dynamic Cut at 150Hz to Control Plosives
I mentioned plosives earlier; these are those concentrated shots of breath on a vocal that you get on “P” sounds which manifest as a low frequency pop.
As I covered in my guide on how to remove plosives, the breath of air generally manifests around 150Hz:
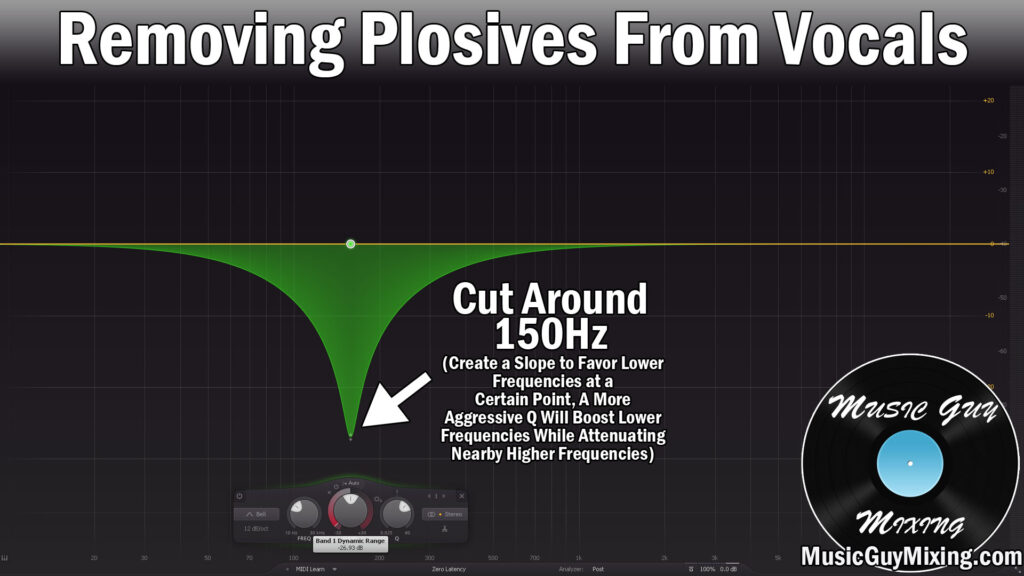
A dynamic EQ cut on vocals in particular is ideal here because it only pulls when you get a concentrated spike around 150Hz which is only associated with plosives. Otherwise this leaves the lower end of the body of the vocal intact.
Aim to attenuate by about 3dB or so when the most offending plosive hits. Don’t expect to completely remove it from the vocal without the listener hearing the vocal get thin; the idea is to simply smooth it out to make it sound natural which tiny plosives can be.
Cut at 200-300Hz For Muffled or Boomy Vocal
If the vocalist was right up on the microphone, you tend to get too much in the 200-300Hz range.
A small 1-2 dB cut can help to smooth out a muffled or boomy bottom heavy vocal around 250Hz. This results in a more balanced vocal from top to bottom.
Dynamic Cut at 500Hz to Remove Boxiness and Add Clarity
Whether you’re specifically looking for a cleaner vocal or even a warmer vocal, I like a small dynamic cut at 500Hz to reactively cut out 1-2dB at most.
This cleans up your vocal by removing the unflattering, unmusical muddy boxiness which builds up, particularly in some rooms with some microphone setups.
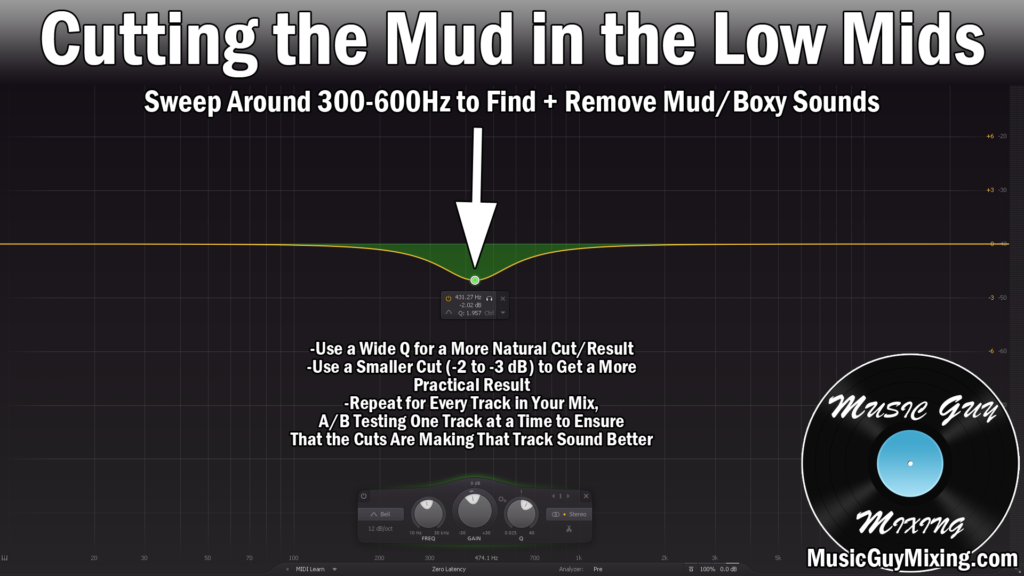
This also saves you from having to boost as much higher up by way of subtractive EQ, or otherwise placing a greater emphasis on the top end of your vocal.
Boost at 1kHz-2kHz for Hollow Vocals
Another symptom of a poorly treated room, hollow vocals are missing a kind of character which makes them sound claustrophobic.
A small, wide boost (by way of a lower Q setting) around 1-2kHz is best. Experiment with adding a decibel or two depending on the severity (use your reference track to hear your balanced vocal for comparison).
I mention this whenever talking about hollow vocals, but boosting TOO much around 1-2kHz results in a nasally vocal.
Boost Around 3-5kHz for Clarity
3-5kHz is another tightrope frequency range where a little bit goes a long way.
A small boost at 3-5kHz can bring out the clarity which can benefit a clean vocal, but too much pushes you into the aggressively harsher neighborhood.
It’s easy to get carried away with a boost here in the name of that clarity, so that reference vocal can help keep you from adding too much brightness to your vocal.
High Shelf at 10kHz to Add Crisp Air
I like a moderate 2-3dB high shelf on my vocal around 10kHz to add some top end crispness to the sound, not to mention unlock a bit more of that air.

This is a rather innocuous range, as well, where you don’t have to worry about grating on the listener’s ears like some of the lower high frequency ranges.
This also has the benefit of bringing out a bit more of the vocal punch on those consonants which can help keep that vocal up front.
High Frequency Saturation
Aside from EQ, we can add a little clarity or air to our vocal with some high frequency saturation, aka an exciter.
I love a plugin like the Waves Aphex Vintage Aural Exciter to add some tasty brightness to tracks in my mix which are lacking it from the recording stage, particularly vocals. Aphex Vintage Aural Exciter

As you can see, the interface couldn’t be simpler; you simply dial in the amount you want by way of the “AX MIX” control. Put this relatively late in your chain to give your track that little extra oomph to the end of a clean vocal.
Additional Clean Vocal Tips
Aside from all of this, keep your reverb to a minimum. This applies equally to your vocal as well as reverb you’d use on a vocal bus or your entire mix.
When using reverb, make sure you EQ your reverb using the Abbey Road Reverb trick.
This involves filtering below 600Hz and above 6000Hz, confining the reverb to the upper mids and lower high frequencies:
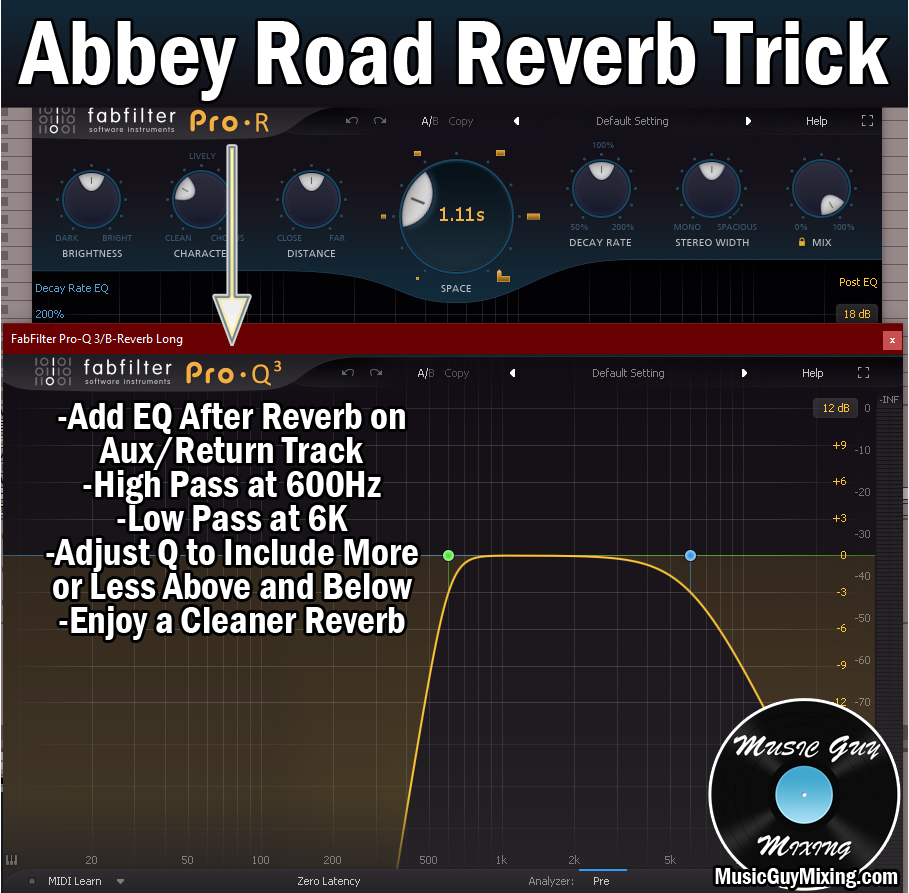
This is a great tip for cleaning up mix mud which in turn yields cleaner vocals. Refer to my tips on using vocal reverb in general for getting better results when you want to add a little depth to your vocal by way of this spacial effect.
In addition to my aforementioned entire vocal chain for tips on getting your vocal sounding its best from start to finish, also check out my guide on how to get a clean mix to ensure the rest of your mix is as clean as your vocals.
