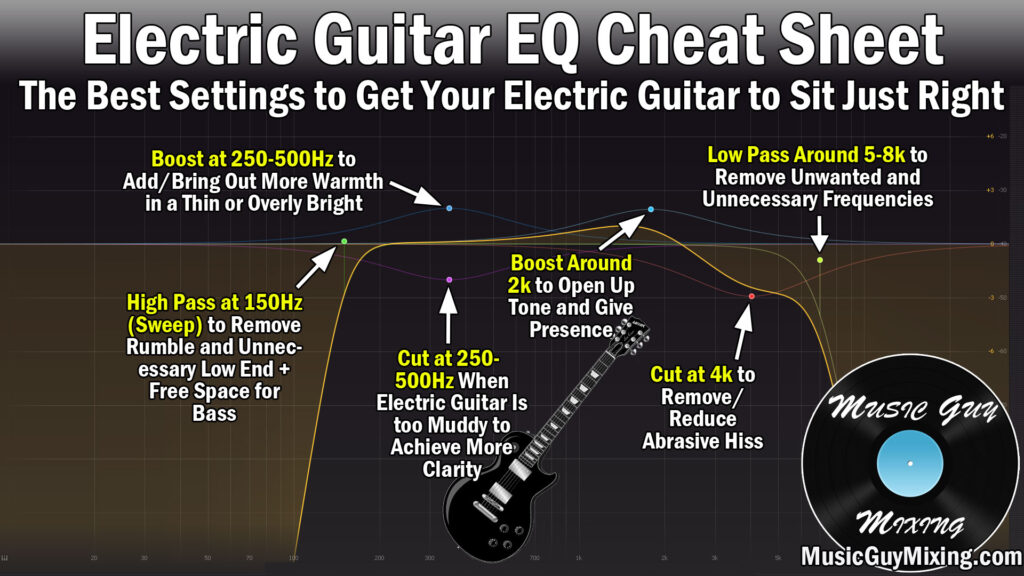
After we record our guitar, we’re significantly limited in terms of the tone. There are some things we can do to sculpt it like I covered when talking electric guitar EQ and more distorted guitar EQ. If our tone is too thin, you may be better served introducing some saturation to beef up your thin guitar. Here’s how to do it.
Filling Out Thin Guitar

As I explained when identifying what does saturation do to your audio, saturation introduces harmonics or overtones based on the fundamental frequency of your tone.
As I mentioned in the aforementioned electric guitar EQ guide, the fundamental frequencies of electric guitar fall in that 200-500Hz range.

This is the frequency range where the body of the guitar exists, even on thin guitar. The problem with a thin guitar tone is that between the pickup and amp settings, the tone is top heavy with too much presence and/or treble.
In other words, the balance is off.
This is where saturation is perfect. We’ve an existing amount of body, but we want to add to and around that fundamental region by introducing harmonics off of what’s already there to fill out that region. It’s a bit like reamping our thin guitar tone with an emphasis on the warmer lows and mid tone controls.
The result is we achieve a more balanced tone by thickening out those low mids and taking all the aural emphasis away from the bright or even harshness in the mix.
The Thin Guitar Fix
One of those swiss army knife plugins which never go out of style, Decapitator from Soundtoys is a saturation plugin with a thousand uses.
One of my favorite uses of it is for tonal balancing, and it was tailor made for filling out thin guitar.
Here are my starter settings I like to use to tame a harsh guitar or thicken out a thin guitar as the solution is roughly the same for both:

Let’s go in order of the signal chain within the plugin.
Style – The style options of Decapitator each model a different piece of analog gear. The “N” is modeled after the Neve 1057 input channel and is one of my favorite styles, particularly for guitar.
Tone and Filters – Before the distortion is added via the drive, we can sculpt the tone a bit with the tone and filter knobs. This is mostly to taste, depending on your needs.
It’s worth mentioning you can turn the drive completely off and just use this as a very basic EQ.
The high and low cut knobs are just types of EQ filters.
The tone knob works as a kind of high shelf or low shelf, favoring either the higher or lower frequency information as you turn it more in the bright or dark direction, respectively.
This knob alone can work well to readjust your tone when you need a slight nudge in one or the other direction.
I like to nudge this a hair in the “dark” direction, particularly for thin guitar. Even the smallest of differences on this knob result in a large difference in tone, so keep that in mind.
Drive – This is the saturation itself and controls the amount of distortion added to your signal.
In other words, turning this up adds more harmonics to fill out the sound more.
When you’ve already got a distorted signal, you can get away with driving this knob higher like I’ve shown in the example. These specifically are the settings I like to use on guitar with a bit too much presence and treble focused gain.
You’ll get different results with the drive all the way up like I have shown depending on the audio you’re working with. As such, you should experiment with this to find the sweet spot for your particular thin guitar track.
Even though I specifically recommend Decapitator, you can apply comparable settings with any stock saturator. I prefer Decapitator’s simplified settings compared to say my Ableton Live “Saturation”:

There’s a lot going on here comparatively, and while you can get where you want with this, you can dial in a few settings and get good results more easily with Soundtoys’ standard.
Regardless of which plugin you’re using, saturation is the key to warming up and filling out your thin guitar. The next time you’ve got existing guitar which came out too thin, reach for that saturation and thicken out that tone!

Pingback: How to Mix Acoustic Guitar - The Perfect Sound Every Time - Music Guy Mixing