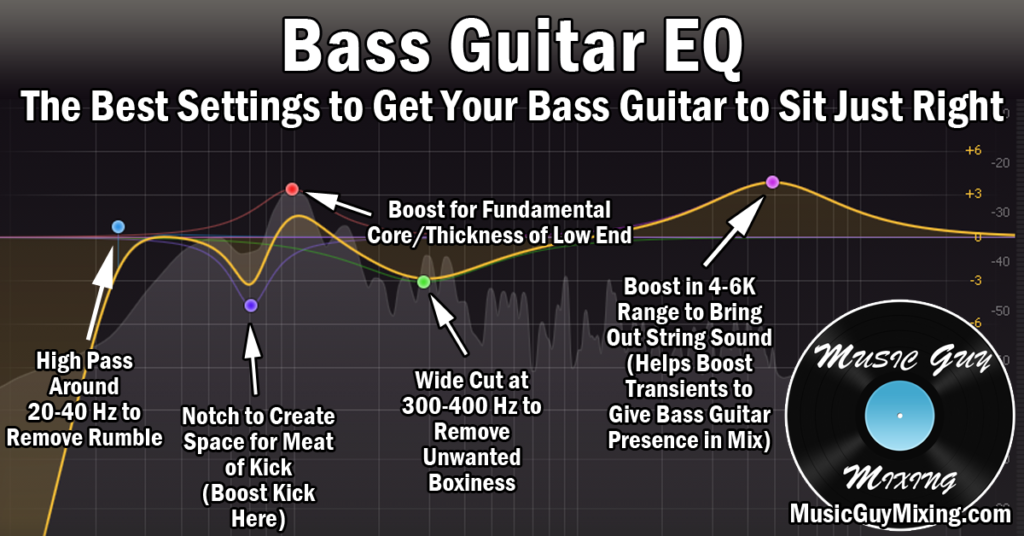
I love a bit of overdrive on my bass in all genres of music as it’s incredibly useful for balancing out your tone (in addition to bass EQ) or helping that bass cut through the mix. Let’s talk the best overdrive bass settings to apply in your next mix to create your perfect tone.
Best Overdrive Bass Settings
Let’s first acknowledge that there are a lot of different packages which bass overdrive comes in.
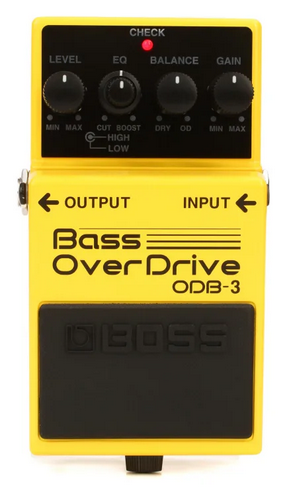
On a macro level, you can have a pedal or other effects processing hardware used for shaping the recorded tone going in during the recording phase either DI or amp recorded bass:
Alternatively, you can have a dedicated overdrive plugin or have overdrive as part of a greater digital effects plugin in your DAW which you can apply in post to shape your tone to taste.
This includes Ableton Live’s own stock plugin for overdrive:

While the packaging and names will vary, the concepts are always the same and generally boil down to 3-4 parameters, so let’s identify what each one is called, what it does, and where you should set it to get the tone you want via bass overdrive.
Drive/Gain
Let’s begin with the “drive” in overdrive. This is artificially distorting the waveforms of your audio, meaning intentionally clipping them (see what is clipping), in order to add harmonics and overtones:

As I recently covered in my comparison of saturation vs distortion, adding distortion to a signal “drives” the peaks of the signal to clip to impart a white noise type of harshness:

In the case of our bass tone, this can beef up the mids or focus entirely on the harsh brightness at the top to help that bass cut through a mix.
The profile of the tone will depend both on the amount of drive we use coupled with the rest of the parameters on our bass overdrive plugin/hardware/tool.
One this is consistent regardless of the remaining parameters – the more drive we add, the chunkier and grittier our tone will become.
You might set the drive to 50% or higher especially in the absense of guitar distortion when the bass needs to represent the grit of your mix in lieu of distorted guitars or guitars in general.
Conversely, for an obviously more subtle effect, you’ll want to keep this >50% and closer to 25%, depending on your intent.
Again, the tone of the amount of distortion we’re adding will be adjusted via the remaining parameters, so let’s talk them now.
Tone
“Tone” on bass overdrive typically refers to the focus of the distortion in terms of frequency.
On the lower end of the tone parameter, the drive will beef up those mids.
As you turn the tone dial higher, this will shift the focus of the drive and distortion to the higher, punchier frequencies.
Pairing a 25% drive with a 75% tone makes for some effective yet subtle punch on the high end of the bass to help impart some audio transients which will make the bass more present in the mix without having to adjust the fader position.
Conversely, pairing a 75% drive with a 25% tone will seriously fatten up your bass tone, giving some palpable buzz to it. This can make it a little muddy and take the emphasis away from the existing transients, but this can be controlled with the “Mix” blend.
Before we talk about that, let’s quickly identify the wildcard on bass overdrive in “EQ”.
EQ
When using overdrive on bass, you may or may not have an “EQ” parameter. This is TYPICALLY independent of the tone dial and usually refers to post EQ to further sculpt the tone you’ve created between your “Drive” and “Tone” settings.
You can think of this as following up the Overdrive plugin with an EQ but specifically in a dedicated chain of its own. It’s not especially surgical as you’d expect and typically just acts as a high or low pass filter.
When present, I like to use the EQ parameter for a very light nudge into a thinner or fuller territory by engaging some high or low pass, respectively.
Note that every now and then, some pedals, plugins, etc. will use “EQ” in place of the “Tone” parameter, meaning this is for focusing the application of the “Drive”.
When no tone parameter is present, you can generally assume the EQ is taking its place. With both parameters onboard, the EQ is more for filtering.
Mix
As always, “Mix” is the Dry/Wet percentage blend of the signal without and with the effect, or in this case the blend of the bass tone with and without the overdrive effect.
Setting this to 100%, all the way to the right, you’ll exclusively hear the bass with the overdrive parameters you’ve dialed in.
While that might seem like what you want considering this whole guide has been about dialing in the perfect overdrive bass setup, don’t sleep on the “Mix” parameter for expediting the goal of finding the perfect tone.
I love adjusting the Mix dial (when using overdrive bass as an insert effect) as it’s the lazy man’s way of quickly finding the perfect sound.
Best Overdrive Bass Settings Tips
Specifically, I like setting trying either of the above scenarios depending on my need (“Drive” to 75% and “Tone” to 25% for fatness OR “Drive to 25% and “Tone” to 75% for punch), then dropping the “Mix” roughly 10% at a time until I find that sweet spot.
This will understandably and typically favor the higher “Mix” blend when the tone is more in need of a palpable overhaul.
Conversely, when my tone is almost where I want it but it needs that subtle nudge of body or brightness, I’ll favor a much lower “Mix” setting to preserve more of my natural and existing tone.
Don’t sleep on bass overdrive and one more reminder – don’t discriminate based on your genre, overdrive isn’t just for rock (or bass for that matter).
Arguably the best application for bass overdrive is balancing your tone and giving your bass that extra something it’s missing and, as such, you can’t get from EQ.