
It goes without saying that home recording has come a long way since it became available. You could go back to the 70’s or even 60’s to find the true origins of home recording, albeit with 4 track recorders. As digital audio workstations first became available and subsequently practical for musicians and audio producers more into the 90’s, the technology has come a long way. Thankfully expensive per hour rate studios are no longer the gatekeepers of making great sounding music at home, and these days it’s possible to record your own professional quality music without virtually any kind of budget. With that in mind, I thought I’d share my pick for the best budget audio interface for seriously recording on a dime.
The Best Budget Audio Interface

I’ve got a few recommendations depending on your budget and needs.
Let’s begin with a workhorse for the smallest of budgets.
Under $100 – PreSonus AudioBox USB 96 25th Anniversary Edition
After working with an 8-input FireStudio from PreSonus with one of my first bands, the PreSonus AudioBox was one of the first audio interfaces I ever bought for myself.
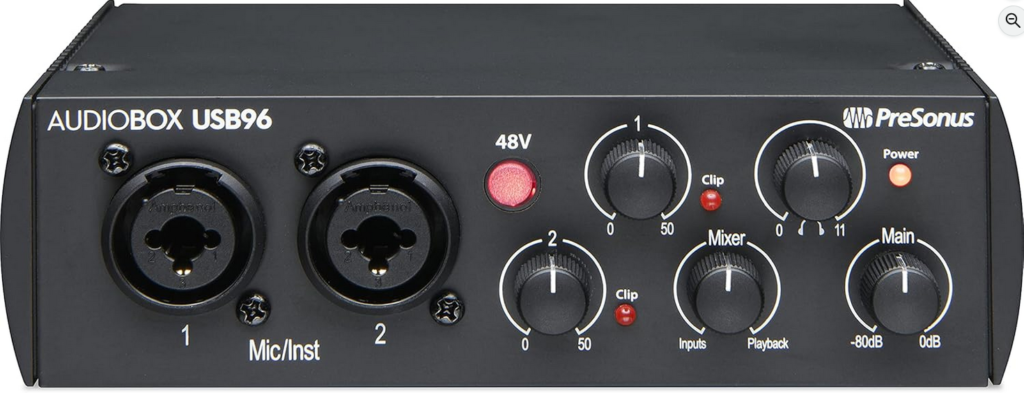
Technically I first got a PreSonus FireStudio Mobile when firewire was the standard (or at least adjacent to the standard of USB), but by the time I got my next computer and firewire was no longer practically compatible, I got a PreSonus AudioBox which is the exact same thing but with USB connectivity.
The AudioBox USB 96 25th Anniversary features a lot of versatility AND its own recording and mixing software in their proprietary Studio One DAW, all for under $100 ($94.99 at the time of my writing this).
As you can see, the AudioBox features two low-noise inputs which can take both XLR/TRS as well as 1/4″ instrument cables:
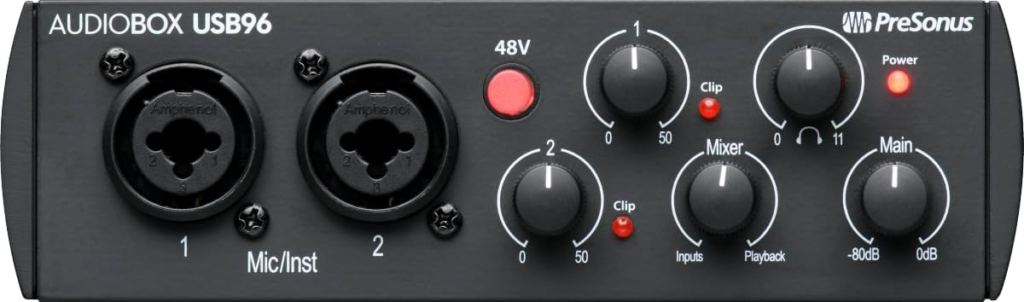
This affords you a lot of versatility as I’ve used these together to simultaneously record:
- Guitar and vocals.
- Acoustic guitar with two microphones (using a number of ways I’ve covered on how to record acoustic guitar).
- Two guitars/a guitar and bass.
- Guitar with a miked cab and a DI track to give myself more options later.
When a lot of the budget audio interfaces skimp on this dual instrument cable and XLR compatibility for both inputs, you get both here and at a cheaper price.
Each 24-bit/96kHz Class A input has its respective input gain control with respective clip lights which light up when the signal is too hot. It actually dynamically lights up brighter depending on how aggressively your input is clipping to give you a better idea of how much you should turn back the dial. Of course a much better rule of thumb is to aim for a -18dB level on average to adhere to gain staging, but I digress.
The 48V button provides phantom power to condenser microphones which need it when engaged, and you’ve got three output dials.
The “Mixer” controls the blend you’ll hear which is useful when tracking to place a greater emphasis on what you’re recording versus the rest of the mix. Otherwise you’ve got a dial each for controlling the level of either the monitors/speakers and/or headphones you’ve connected.
Here’s a peek at the back:
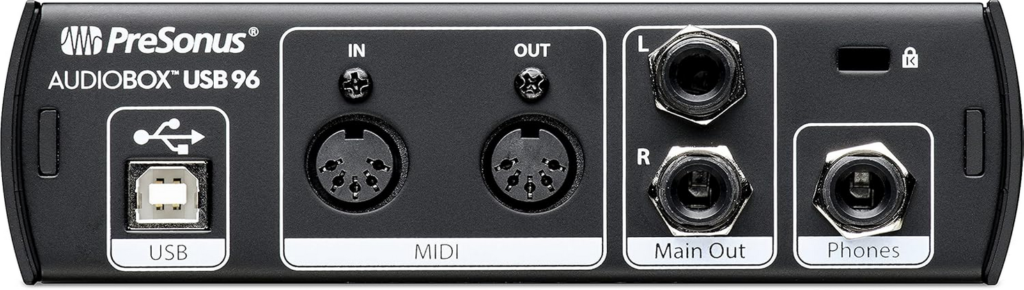
It’s got outputs for connecting your monitors/speakers and/or headphones as well as input and output connections for midi instruments.
Lastly, the device connects to your computer/is powered by a standard USB 2.0 connection.
That’s the sole drawback of the device and the only reason it’s available at the price point it is; USB 3+ is the standard today so it’s not the most future-ready audio interface.
For what it’s worth, PreSonus does have a USB 3+ equivalent with a USB-C connection in the PreSonus Studio 24c for about $60 more than the AudioBox.

Aside from offering up to a 192kHz sample rate it’s exactly the same as the AudioBox in terms of the interface, though it does have a more precise visual monitoring display on the front as you can see roughly where your level is, making it easier to gain stage exclusively using the audio interface for quickly setting the right level.
On the back it’s more or less the same; two monitor outs, a stereo out, and your midi input and outputs, along with the USB-C connection:

If you can afford the extra $60, the improved transfer rate of the superior USB technology will generally translate to cleaner recordings over the long term, and it’s still more affordable than some other comparable options, making this my pick for the best budget audio interface for accounting for the future as USB 3 continues to be the norm.
~$200 – Focusrite Scarlett 2i2
Speaking of which, at the next price point I have to acknowledge arguably the most popular budget audio interface available today, Focusrite’s Scarlett 2i2:

At a price point of a little over $200, this has a few bells and whistles you don’t get with the aforementioned PreSonus models.
These features are typically standard on most of the latest generation of Scarlett audio interfaces, so a quick rundown:
What Does Auto Do on Scarlett 2i2?
“Auto” is a somewhat handy feature which my go to audio interface (which I’ll cover in a moment) also has.
When you punch this button then sing and play for a bit to basically audition how loud it will be when you’re recording, the device will automatically set the input gain for that track accordingly to what it believes is an ideal level.
This obviously isn’t a feature you can have with fixed analog dials which have min and max ranges like the aforementioned PreSonus models have, but the input dials are free and partially digital on the Scarlett like with many audio interfaces. As such, you can control them on the device itself or using Focusrite’s “Focusrite Control 2” software on your computer (similar to PreSonus’ “Universal Control”).
The gain is reflected by the visualizers which are color coded and will light up accordingly to varying degrees to reflect your input level.
I admit I never rely solely on the auto feature for setting my final level, but it can get you in the neighborhood.
What Does Safe Do on Scarlett 2i2?
The “Safe” feature will responsively adjust the input gain level in real time if your source suddenly gets loud enough to reach the point of clipping.
This isn’t perfect, but it can salvage your recording in the right (or wrong) circumstances when engaged to account for a part of the performance you might not have accounted for.
What Does Air Do on the Scarlett 2i2?
The “Air” feature on Scarlett 2i2 (amongst others) adds a small high shelf around 7kHz to bring out a bit of added crispness and/or that feeling of “air” to your recordings.
It’s one of those things that sounds good in theory, but you can just as easily add this after the fact in the mix. I actually avoid using this because you don’t want it baked into the recording if you change your mind later.
Everything else is pretty straightforward; the instrument and XLR cable inputs aren’t shared like on the two PreSonus models previously covered. Instead, you’ll find the instrument inputs on the front with the XLR inputs on the back:
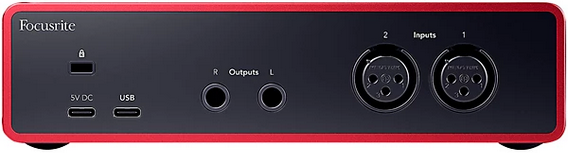
Can I Record Two Instruments and Two Microphones Simultaneously With the Focusrite Scarlett 2i2?
A fair question worth addressing because the inputs aren’t shared like on the PreSonus models is can you recording two instrument and two microphone inputs simultaneously with the Focusrite Scarlett 2i2, basically recording 4 tracks simultaneously in your DAW?
Unfortunately the answer is no; it’s two inputs max. This is why each input on the front and back is identified with either a 1 or 2. You’d have to get a larger and more expensive model which allows for more inputs.
$300-$400 – PreSonus Quantum ES 4
Lastly, I need to give some love to the audio interface which I’ve been using for the last couple of years, the PreSonus Quantum ES 4 USB-C 4×4 Audio Interface.
If you need to record four inputs simultaneously, this is my pick for the best budget audio interface and is a great option at an affordable price point in that mid-$300 range:

The controls on the front are streamlined for adjusting individual levels as necessary – you simply punch the button of the track you want to adjust the gain for then turn the dial accordingly. You can see the meter live as you audition your level to aim for that sweet spot in the -18dB range.
It also has the “Auto” feature which acts exactly the same as before in that, when engaged, it will automatically set what it believes to be the optimal level based on a bit of live auditioning you do into that input.
It’s also got the 48V phantom power button which you can engage as necessary for your condenser mics which need it.
The only other buttons are for controlling your monitoring levels.
Push “Main” to set your output level to your monitors/speaker by way of the dial, and likewise with the headphone level(s) of which it has two for tracking and/or monitoring quietly with a plus one.
It has two low-noise instrument dedicated inputs on the front, then on the back you’ve got your main and line outs along with a midi in and out and four universal inputs which are set up for receiving XLR or more instrument cables:

Note that like 2 was the max number of inputs or sources you could track with the 2i2, the PreSonus Quantum ES 4 maxes out at 4 inputs.
I’ve used all 4 on a single acoustic guitar recording before, using track 1 as my DI from my acoustic guitar’s preamp, then tracks 2, 3, and 4 for three microphones.
It’s much easier controlling everything when you’re using multiple inputs using PreSonus’ Universal Control software. Here’s a look at the practical view of the software as it relates to the ES 4:

You can tick the 48V buttons for the inputs which need phantom power or tick the Auto Gain buttons to have each source’s input gain level automatically adjusted after some live auditioning.
Again, I use this as a loose guide before doing some final tweaking on each input, but it’s a time-saver to get you in the neighborhood, especially with 4 tracks firing at once.
You have all of the output level controls for monitoring for more efficiently adjusting those, as well.
One of my favorite details is the “Scene” feature. Denoted by the three file symbols at the top, this allows you to save gain input and otherwise snapshots of your recording configurations. This is very useful when you’re bouncing back and forth between different setups but the microphone or instrument levels aren’t subject to change respective to each one.
The ES 4 also comes with the Pro version of PreSonus’ Studio One software, but I can’t speak on its quality as I’ve been an Ableton Live guy for well over a decade now outside of using and/or incorporating some of the virtual instruments from one of the earlier versions.
I’ll cover some of the more extensive options which require more of a financial commitment if you’re looking to live record of a full band or even a more complicated drum kit situation with 8 or 16 inputs in the future, but the above are all great options from recording two to four inputs simultaneously to get great sound while on a micro budget.

