
Synths comes in all styles, flavors, sizes, you name it, but just like any other instrument in our mix, they can benefit from some effective EQ. In this synth EQ cheat sheet, I’ll show how to use EQ to sculpt the tone and get our synths to sound better in the mix.
Synth EQ Cheat Sheet
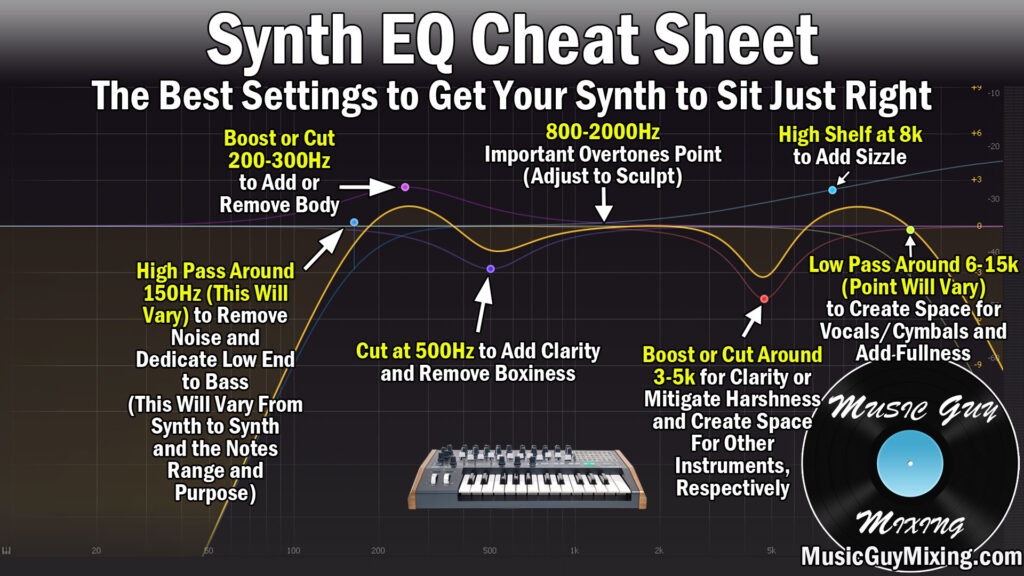
This synth EQ cheat sheet highlights all of the important frequencies, your options for each area, and what outcome they’ll achieve:
Now let’s go through each section one by one like I do with every EQ cheat sheet to better explain what you should do.
Let me preface before we get into the nitty gritty of this synth EQ that you’ll need to tailor this more than usual to your own track as again synth is a broad term, but these are great places to start.
High Pass – I always preach high passing every track in your mix (even your bass and kick). 150Hz is a good place to start, but you’ll definitely want to try sweeping to listen how it’s affecting your synth.

Depending how much low end information is in your synth, you may want to go higher, or you may even want to go lower.
Unless an instrument is representing my mix’s low end like a bass, synth bass, sub, or kick, I’ll generally sculpt out everything and anything below roughly 150Hz but certainly 100Hz, with this high pass filter.
I somewhat liken it to high pass filtering like I mentioned in my electric guitar EQ guide. There’s frequency information there; strictly speaking the low E string is roughly 83Hz. I still prefer to filter above this point to let the mid range and upper-mids of the guitar gel with the bass.
It keeps things clean and fits the jigsaw puzzle that is your mix together perfectly, and the synth is no exception.
200-300Hz – Like most instruments, the body of the synth resides in the 200-300Hz area, give or take.

A boost here will add more thickness to the body which can help if you feel your synth is lacking or feeling weak or in need of fullness. Conversely, cutting here thins your synth out and adds clarity by way of subtractive EQ.
Like many of these decisions, it’s up to you to determine what your synth is lacking and what sound you’re chasing. Remember to use references when mixing and have a pro mix with a synth sound you’re trying to emulate so that you can keep your ears trained on the goal.
Cut at 500Hz – Is there ANY instrument which sounds good at 500Hz, or better said doesn’t benefit from a small cut here?
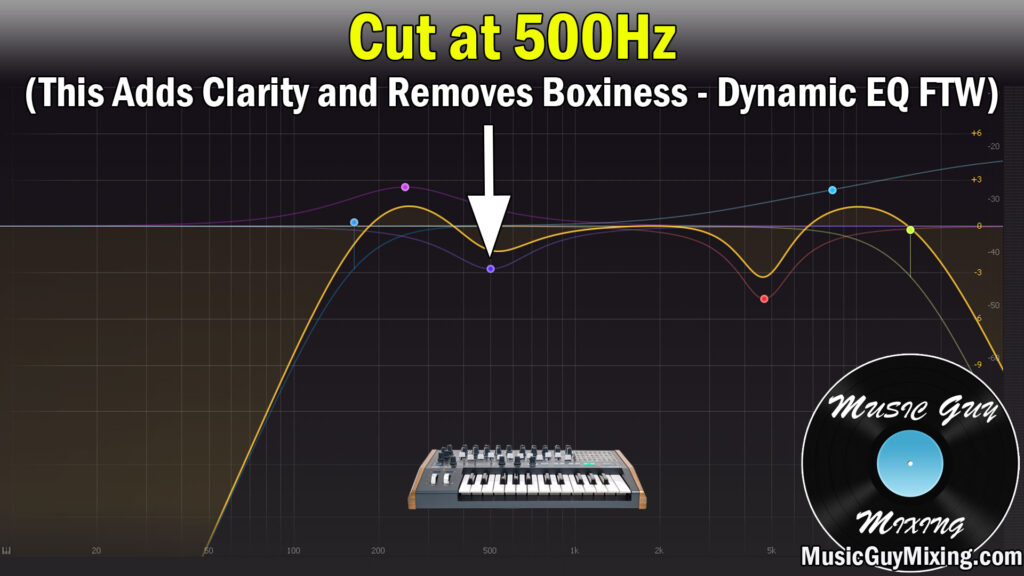
There’s a kind of claustrophobic sound which builds up here and adds to the mud of your mix.
Try boosting here to here it on full display, then try split testing the synth with and without this EQ cut. I typically recommend a dynamic EQ cut in this area, but more often than not with a synth track I’ll leave it as a static cut for the better.
800-2000Hz – I don’t have a specific recommendation for this overtone body rich stretch of your synth.
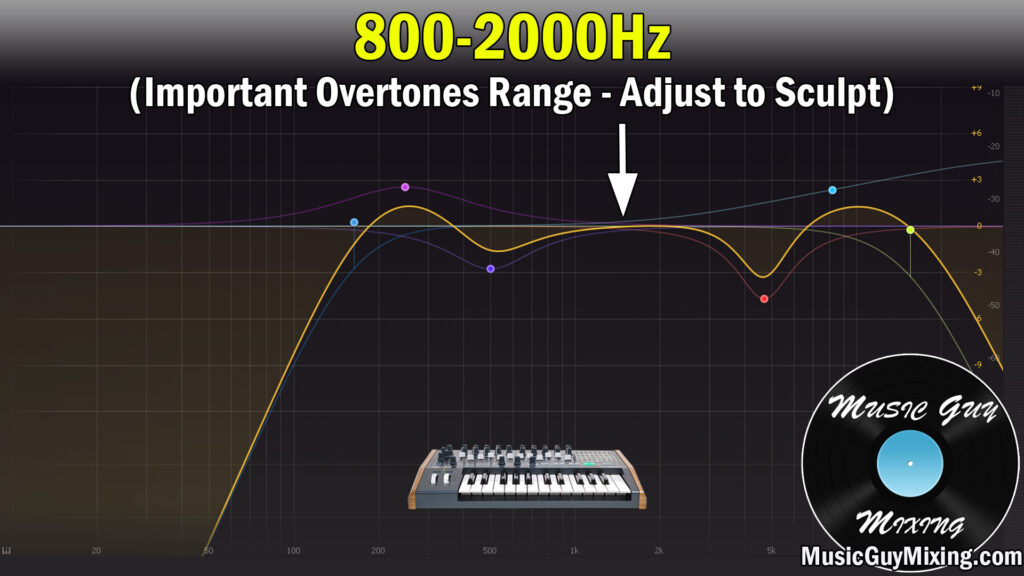
In fact, I typically leave this as it is. A lot of the pleasant frequencies which make up your synth are in this range, so be mindful about adjusting this section one way or the other.
If nothing else, this is a lesson that you don’t ALWAYS have to adjust something for the sake of adjusting something. Sometimes doing nothing is the best thing you can do in mixing, and it’s an important mix tip to take to heart.
3000-6000Hz – Clarity vs harshness. These two principles are at odds in the 3-6k region in most synths.
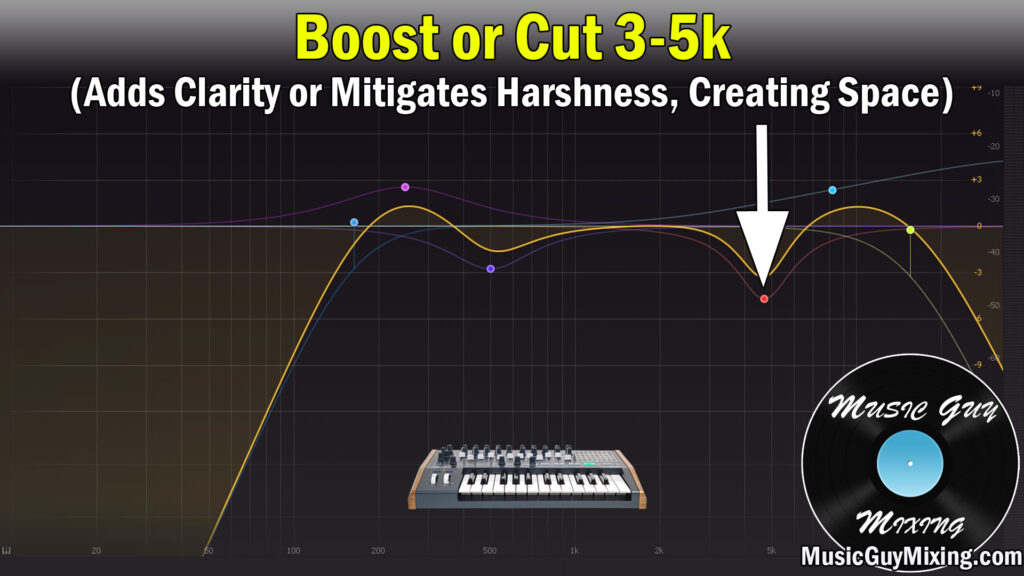
On a darker synth, you can add some much needed clarity here with a boost without detracting from the frequency profile of that track.
For an already bright synth, you can benefit from a slight cut here due to our sensitivity to abrasive frequencies in the 4k region.
At the very least, it’s another region to pay close attention to and experiment with.
High Shelf 8k – I typically like a high shelf to add a little sizzle via synth EQ.
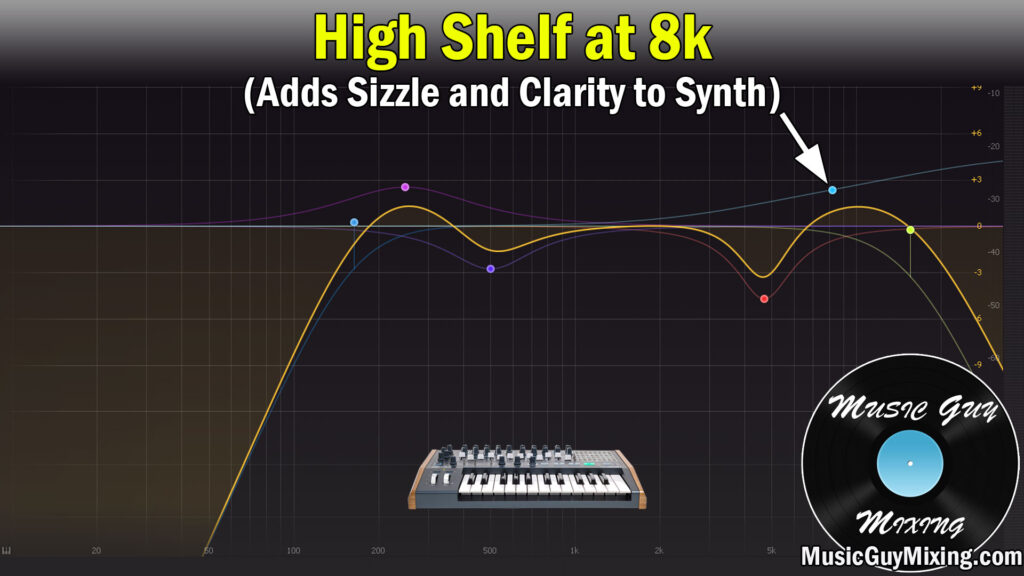
Brighter synths won’t need as much if anything. Darker synths can still benefit from a little high shelf here.
Low Pass – I listed 15k as a low pass point, but DO NOT be afraid to more aggressively low pass your synth.

If you have some reference tracks up like I recommended, you might be surprised at how low the filter on the high end goes. That’s a lot of why commercial synth tracks sound so full – they sacrifice top end via subtractive EQ to emphasize the mid-range.
I’ll use the onboard low pass filter knob down to 6k to really ease the sharpness of a synth and sometimes it’s the best fix to get it sitting perfectly in the mix. Not only does it yield that fullness in the mid-range but it opens up the top end to vocals and cymbals.
As soon as you filter down that low it will sound too flat and dark because of the immediate contrast.
Go back and listen to the reference track with the synth, then revisit your synth and it will sound much more natural. You may need to move the filter up to 7k or 8k, but that reference will help you find the sweet spot you’re going for in context.
Synth EQ Tips
- Have a reference mix with a synth to refer to when mixing synth.
- High pass at 150Hz to dedicate low end to bass, though this will vary depending on the synth, notes, etc.
- Boost or cut 200-300 to add or remove body from thin or boomy, muffled synth accordingly.
- Cut at 500Hz to remove claustrophobic boxiness and add clarity.
- 800-2000Hz is an important overtone range for synth. Oftentimes it’s best to leave this section alone but adjust accordingly.
- Boost or cut at 3-5k to add clarity or mitigate harshness. Generally naturally brighter synths don’t need a boost here.
- Add a high shelf at 8k to add a little sizzle and further clarity if necessary.
- Low passing creates space for your vocals and cymbals, but the exact ideal point will vary from synth to synth (reference helps here). Filtering as low as 5-6k emphasizes fullness in mid/upper-mid frequencies.