I recently talked about sending delay into reverb, but it’s well worth acknowledging that you can do the reverse, as well. Sending reverb into delay gives the tail of a reflection its own reflection and can be used in a number of ways. Let’s talk using reverb into delay, how to do it, and why do it.
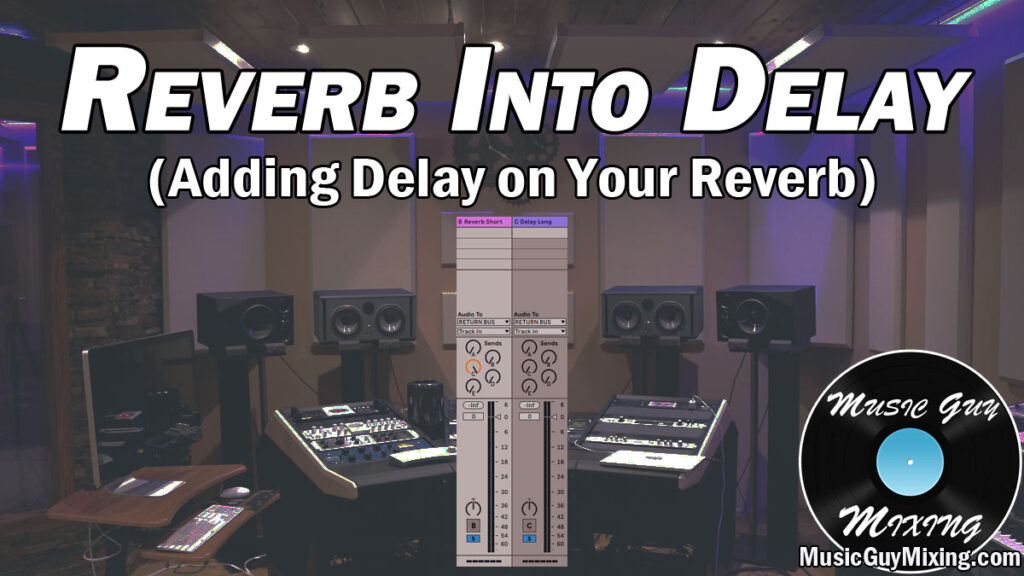
Reverb Into Delay
First, let’s talk how to send reverb into delay in your DAW.
How to Send Reverb Into Delay
To add the reflections/effects of your delay onto your reverb, it’s best to use a pair of Aux/Return tracks and send the reverb into the delay.
Normally when we use an Aux/Return track, we’re sending it to an audio track to get whatever effect is on that Aux/Return track to blend with the dry audio of the track in question.
So we have our Aux/Return track (known as an Aux track in many DAWs but referred to as a Return track in my DAW, Ableton Live) with a delay plugin on it.
If we want some delay on our lead vocal, for example, we’d simply turn up the respective send dial for the Aux/Return track with the delay on it on that vocal track, turning the dial up to get more of that delayed signal, blending it to taste.
In the case of sending reverb into delay, it’s the same concept, but we’re turning up the respective send dial for the Aux/Return with the delay on it on our Aux/Return track with our reverb on it.
This gives our reverb the effect of the delay, basically adding an additional reflection(s) to the sound and tail of the reverb.
Of course, this will only be heard if we’re sending that reverb Aux/Return track to actual audio, like the aforementioned/exampled lead vocal.
Let’s say the only Aux/Return track we’re sending/blending with our lead vocal is our reverb.
We’d of course hear the vocal, then after the predelay period of time on the reverb, we’d hear that vocal coated in reverb, taking on the sound of the room we’re simulating via that reverb (check out my additional tutorials on reverb for getting the most out of this effect).
If we turn up the send dial for the delay on the reverb’s Aux/Return track, we’d hear an additional reflection(s) which take on the settings of the delay. This includes the delay time, filter, and additional reflections/feedback settings.
Reasons to Send Reverb Into Delay
With a lot of different ways to set up that delay, we can give our reverb some very different effects.
One of the most common uses of reverb into delay is creating an easy reverb throw without sacrificing the initial reverb on your track.
If you set the delay time to be 1 bar/note, you’ll get the sound of that reverb echoing again in perfect time on that delay.
This makes for a nice taste of ear candy when used effectively like say on a vocal. While this is best used in moderation, this sets us up to simply automate up the prominence of the reverb throw by way of that delay’s send level/blend.
Using reverb into delay also obviously just allows us to give our reverb itself some more depth. This can be used to add sustain to the tail, especially when we’re using additional reflections on the delay itself/more feedback.
Turning this up all the way can make that reverb tail basically loop and go on forever, creating some very interesting effects. I’ve used this before as a kind of looping pad to create a little texture beneath the rest of the mix in specific spots (or for the mix’s duration).
Like I mentioned in my aforementioned delay into reverb tutorial, I generally like to send the shorter one into the longer one. If my reverb has a 2 second decay versus what translates to a 500ms delay, I’ll generally opt for using the delay into the reverb.
I find you get more practical use, natural sounding results by prioritizing by length.
Practice isn’t always the goal, however, so don’t be afraid to send a ridiculously long and colored reverb into a relatively shorter delay and vice versa to get some oftentimes unexpected results you might end up loving in your next mix.