I recently covered sidechain reverb and how to use it in your mix to keep whatever you want to apply it to dry and clean while still getting the reverb on the backend. One of the best applications of sidechain reverb is on your snare, so let’s talk how to set this up with the best settings to dial into it to get the best of both worlds.
Sidechain Reverb on Snare

No matter what you apply it to, sidechain reverb is used as a kind of parallel processing.
With that in mind, we have a couple options in terms of how we roll it out, including using it as an insert (of sorts).
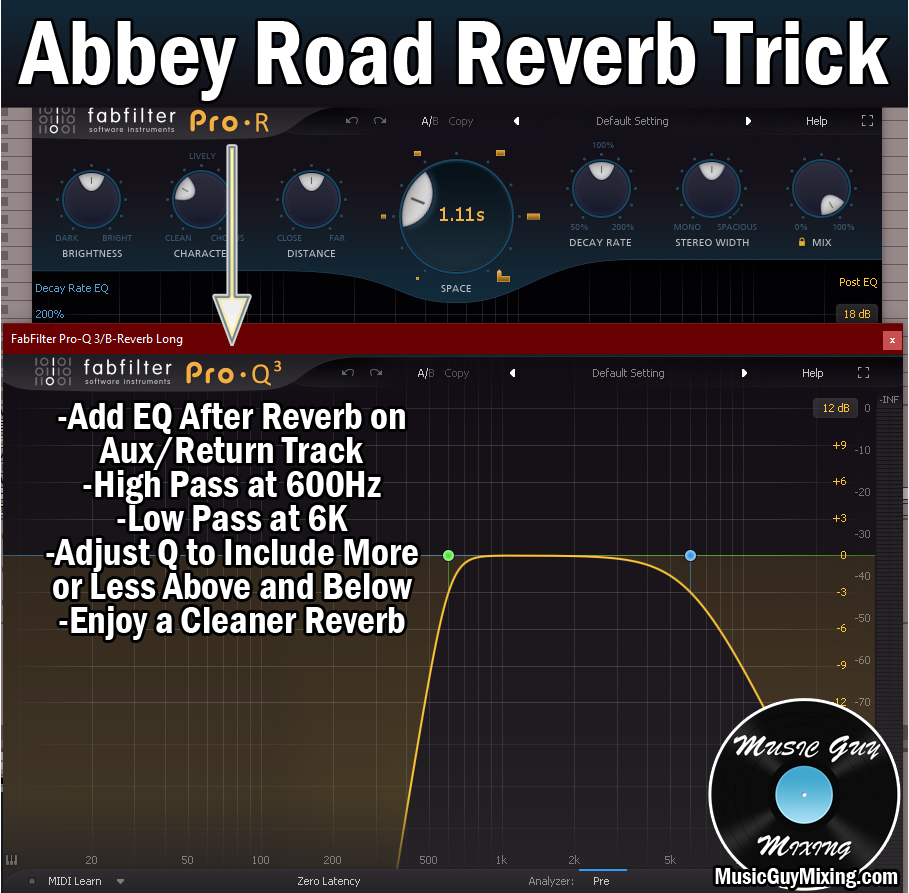
First, we can use this as an Aux/Return track and blend it in to taste via the snare’s send dial. While you can certainly do this, I prefer to keep send effects for instances where I’m applying that effect to multiple tracks at once (like reverb). The problem with setting up sidechain reverb is that we can only sidechain it to the track we want to apply it to, which is why I opt for a different approach.
Different DAWs have different ways to set this second approach up, but in my DAW of choice in Ableton Live, I use their audio effect rack capability to create the parallel processing I need essentially as an insert right in the chain on that snare track itself.
Consult your DAW for information on how to go about doing this, but in Ableton you would drop a reverb and compressor on your snare’s insert area (typically at the end), then select them both and type Ctrl+G to group them. When grouped, my instance of FabFilter’s Pro-R and Ableton Live’s compressor will look like this:

Now click the “Show/Hide Chain List” button (the lowest of the top left buttons with three dots and three lines) and right click in the “Drop Audio Effects Here” section and select “Create Chain”.
Rename the new chain “Dry” as this is the snare as it already sounded, and the initial chain “Reverb” as this will exclusively be the sidechain reverb instance of our snare.
Now click the arrow on the compressor and tick the “Sidechain” button to engage it. The compressor will now require a source to control the threshold of that compression. We want to set it to our snare itself in this case. The Pre vs Post FX refers to where in the snare’s processing chain the compressor should interpret the level for the threshold.
When everything is set up, it will look something like this:
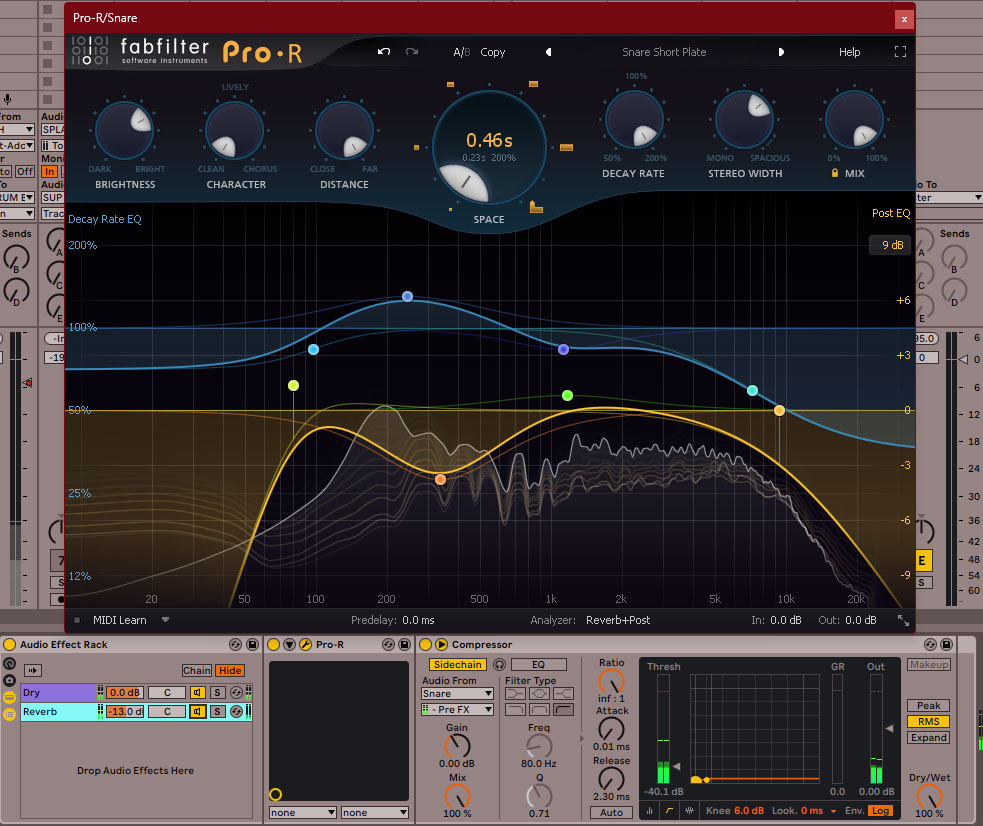
While you can dial in some very long time/space/decay on your snare’s sidechain reverb, a more practical application would be to use it for a touch of sustain on the backend.
One of the reasons I like FabFilter’s Pro-R or Pro-R 2 is the ability to color the sound of the reverb tail. A brighter, 1-5k predominant reverb tail helps to make the reverb tail sound like an extension of the snare itself once that snare stops playing.
To achieve this, I went with a little under a half a second decay time, largely filtering out everything below 1k save for a small bump in that body of the snare above 100Hz.
Aside from setting the snare as the sidechain as previously mentioned, set the compressor which follows that reverb a ratio of infinite:1, and a near instant attack and release.
Lastly and most importantly, set the threshold well below the average level of the snare. This is the one you’ll have to adjust as you reference the effect to determine the best settings.
The effect of all of this is that the compressor will absolutely silence the effect of the reverb when that snare is playing, keeping it clean in the mix. As soon as the snare cuts off, that reverb tail will assert itself by way of the quick release and rest of the settings.
The profile of the reverb itself we dialed in creates the effect that the snare is actually thicker and longer than it is, giving it more dominion in the mix.
Again, this is a more practical, not to mention subtle use of the sidechain reverb on the snare.
You can achieve a more interesting aesthetic effect, kind of like a reverse gated reverb, but cranking up the length of the reverb tail, not to mention changing the color and character of it by way of the rest of your reverb’s settings.
One last note regardless of how you’re using your sidechain reverb – make sure it’s set to 100% wet so that we’re exclusively getting the sound of that reverb on the tail and not just more of the dry sound of the snare itself.
You can now blend in as much of that effect as you like to make that sidechain reverb on your snare more or less prominent by way of the volume for its specific “Reverb” chain in the audio effect rack on the left. Whether you want a more subtle effect or want to use this to draw the listener’s ear in spaced out select moments, have fun experimenting with your sidechain reverb on the snare in the mix!