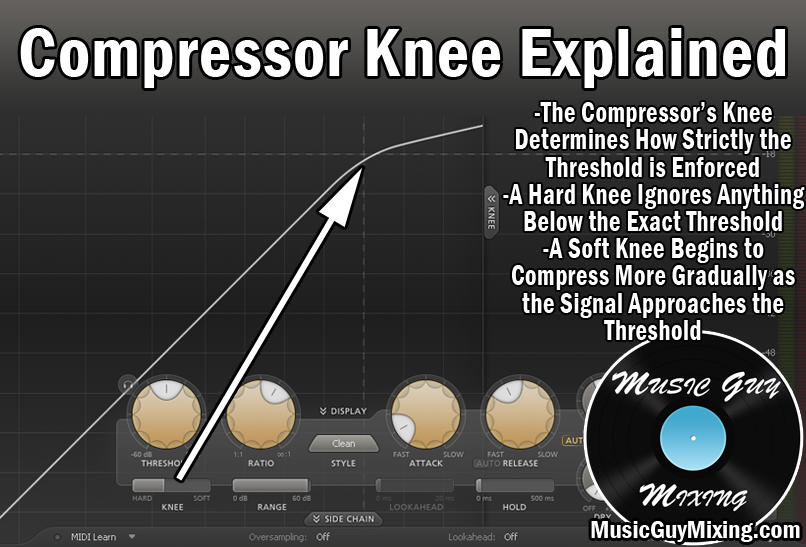
Compression is all about managing the dynamics of your audio to provide a more consistent sound which sits better in the mix without sacrificing transients. While the acoustic guitar isn’t typically one of the more dynamic instruments, it still can benefit from the right settings. With that in mind, let’s talk the best acoustic guitar compression settings you can dial in for an instant improvement in its presence while keeping it visible in the mix.
Acoustic Guitar Compression Settings

First, here is a snapshot of the acoustic guitar compression settings I typically begin with (created using FabFilter’s Pro-C) when applying a compressor to my mix’s acoustic guitar:

Feel free to dial these in, but let’s talk about each one of these acoustic guitar compression settings by parameter one by one and why I recommend what I do for each.
Threshold
The compressor’s threshold dictates the level your acoustic guitar must meet before compression will begin. Setting this too high means that your acoustic will never reach that level, and thus no compression will occur. Setting this too low will (combined with other acoustic guitar compression settings) absolutely squash your sound and suck the life out of the performance.
Regarding the threshold on your acoustic guitar’s compressor, the sweet spot is generally just above the quietest practical part of the performance:

Note that if you have a lot of dynamic range with regards to different sections of the performance, like finger picking in the verse then strumming on the chorus all on the same track, you should break these into two separate tracks so that you can set the finger picked/quieter part of the performance’s threshold lower than the strummed part which will be louder by comparison and thus require a higher threshold.
Alternatively, you can automate this parameter while keeping it all on the same track with a single compressor, setting it lower for the picked parts and higher for the strummed parts.
Ratio
The ratio on the compressor is the main driver of how much gain reduction you get and thus how visible the compression is.
For acoustic guitar compression settings, I like a 4:1 ratio to achieve a nice compromise between control and maintaining a natural sound where the listener won’t hear the compressor working:

In literal terms, a 4:1 ratio means that every 4 dB of our acoustic guitar’s performance’s “peaks” exceed the threshold, they’ll get turned down by 3 and output over that threshold by 1dB (4-1=3) after the compression:
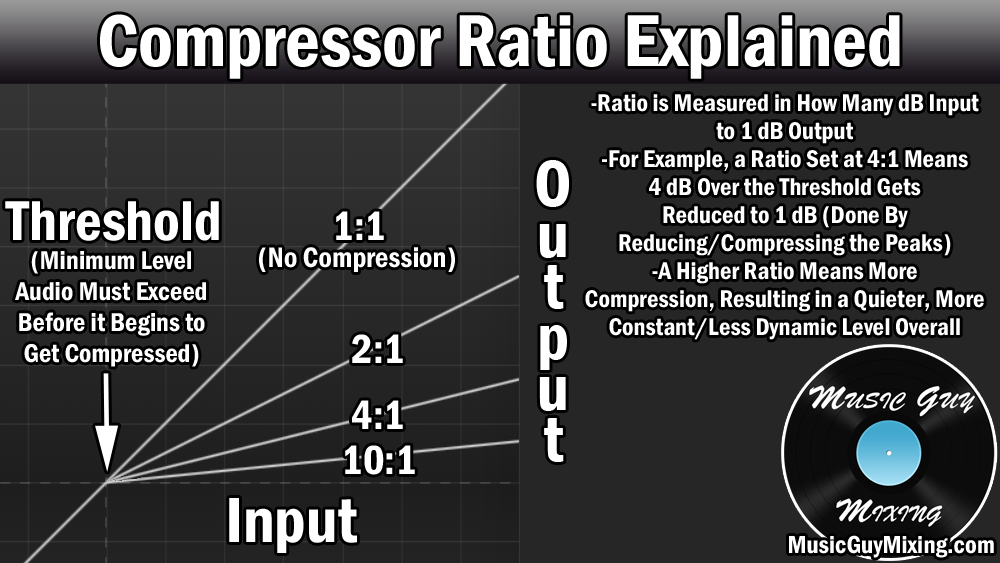
While context always dictates this, a 4:1 ratio is generally considered to be the best compressor ratio to use because it works in that sweet spot as just mentioned of offering you control without sacrificing too much in the way of natural dynamics.
If your performance is just finger picking, you may want to opt for a 6:1 ratio, and if it’s just strumming without much dynamic range, you might drop it to 3:1.
Still, while a more dynamic “instrument” like a vocal will likely require a higher ratio, the average to light dynamics of an acoustic guitar typically lend themselves to 4:1 nicely.
Attack
The audio transients on the acoustic guitar are the sounds of fingers or a pick on the strings. That high frequency percussive sound precedes the sound and notes of the strings themselves and the body of the guitar. Preserving that sound is what makes an acoustic guitar or any instrument punchy in mixing terms.
A big part of preserving that aspect of the acoustic guitar is to make use of the attack parameter on your compressor.
This is essentially a delay feature on the compressor such that it waits an amount of time measured in milliseconds once the threshold is met before it applies compression.
On an acoustic guitar, 10-15ms is long enough such that it will allow the initial high frequency “bite” of the transients to come through before the compression engages to control the body and remainder of the sound:

If you set the attack as low/fast as it will go and listen to the acoustic guitar, you’ll notice that it will begin to disappear in the mix because you’re losing that initial front end bite of the transients which work to draw the listener’s ear to the remainder of the sound and track.
10ms is enough to keep that intact, thus keeping the guitar visible in the mix while still enjoying the benefits of the compression.
Release
If the attack affects the entry of the compression, the compressor’s release controls its exit.
We want to set this such that we can create a natural off-ramp for the compressor so that once the audio level drops below the threshold, the audio can return to its natural, uncompressed state without notice.
50ms as a compression release setting on acoustic guitar works well for a sweet spot so that you don’t get artifacts associated with cutting this too short and compressing needlessly on the longer end:

Together this maintains the dynamic range when compression isn’t necessary without letting the listener hear the compressor at work.
Makeup Gain
Lastly, adjust your compressor’s output gain to make up for whatever gain reduction occurred as part of the compression.
Because acoustic guitar doesn’t require a lot of compression, you typically want to see gain reduction averaging around 3dB or so when compression is occurring and 6dB at most.
As a result, you need to turn up the output gain control to roughly 3dB or so to compensate for the gain reduction, essentially matching the same level of your acoustic guitar’s track with or without compression. This allows you to maintain gain staging, keeping your acoustic guitar track sitting where it should in the mix, not to mention keeping the overall mix sounding its best.
The compressor itself will tell you how much gain reduction is happening in real time, so aim for that.
To ensure you set this properly, toggle the compressor on and off and there should be no real change in the volume of the track either way.
Acoustic Guitar Compression Settings Tips
- A little compression on your acoustic guitar can help it sit better in the mix, not to mention give it more thickness and sustain.
- Set the threshold to roughly the quietest practical part of the performance.
- Split your acoustic guitar into two tracks if the performance is decidedly different in its dynamics between different sections of the song/performance so that you can est the threshold on each one more effectively.
- Set the ratio to 4:1 for a nice middle ground for a moderate yet subtle amount of compression. Aim slightly higher if it’s entirely a picking/arpeggio part or slightly lower for just strumming and less dynamics in the performance.
- Aim for an attack around 10ms to maintain the initial high frequency transient punch of the percussive sound of the finger or pick on the strings themselves.
- Set the release around 50ms to create a natural and subtle off ramp back to its uncompressed state for the quieter parts of the performance.
- Adjust your output gain to offset the gain reduction of the compression. Whether the compressor is on or off, the level should be roughly the same.