I recently talked about how to use an SSL strip to EQ your vocals, now let’s take a look at the other half of the strip and other half of processing audio in general – compression. This SSL vocal compression guide will cover the best settings to dial in to compressing your vocal using an SSL style board compressor.
SSL Vocal Compression
Here is a snapshot of the SSL vocal compression settings to use on your vocal:
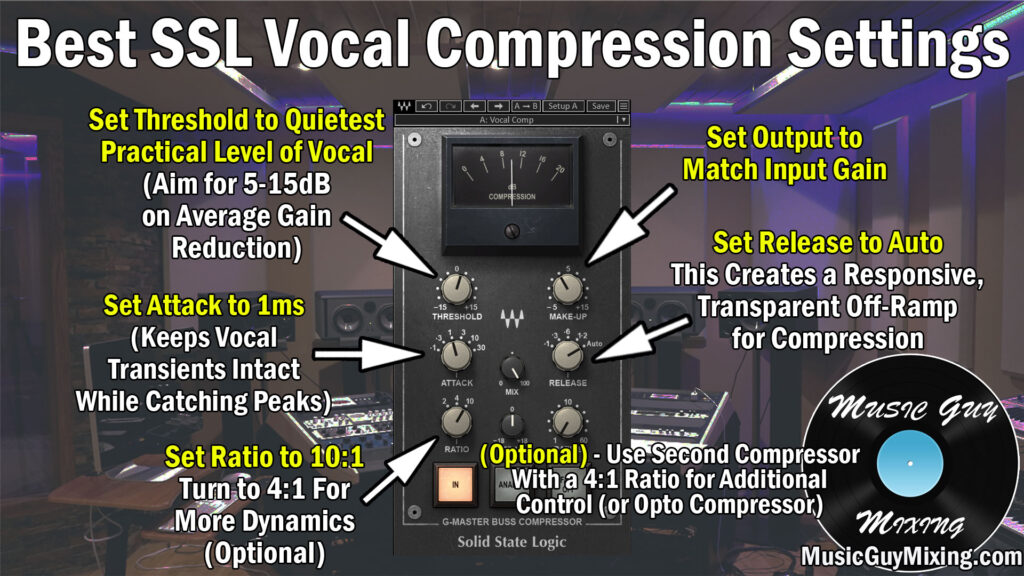
I used a dedicated SSL style compressor, in this case the SSL G Master Buss Compressor from Waves. Typically I like and use this for bus compression as the name would suggest, but it works well on a dedicated track for clean, fast, responsive dynamics control which doesn’t leave artifacts.
Now let’s take a look at each parameter on the SSL vocal compressor to explain why I recommend setting each one where I do.
Threshold
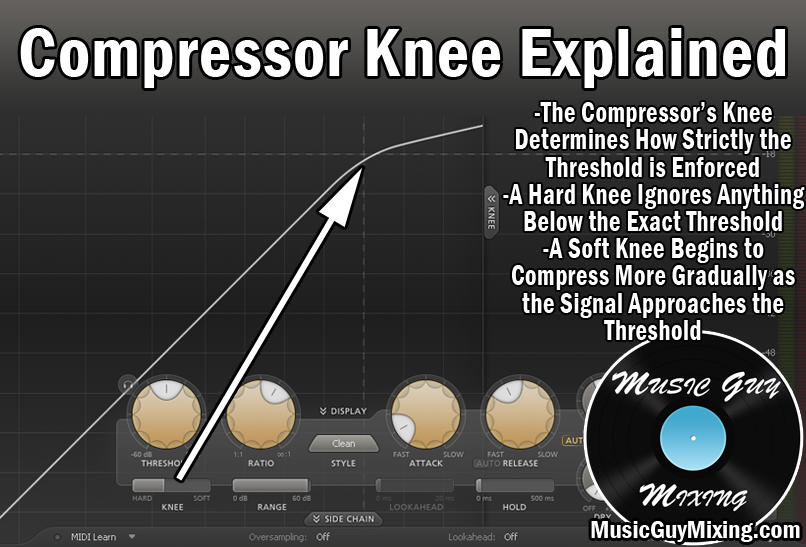
The compressor’s threshold is the level the vocal needs to reach in order to trigger compression. If the threshold’s “bar” is set too high, the compression will never occur because the vocal will never peak loud enough to trigger it.
Typically I like to set this at roughly the quietest practical point of the vocal. In other words, what is the quietest word you need the listener to hear in the vocal on that track. In the case of the G Master Bus compressor, play back that vocal part on repeat and when it triggers, you just want to barely see the needle move.
Ultimately I like to set this so that I achieve between 5 and 15 decibels in gain reduction as a result of the compression. Admittedly this is a product of all of the settings on the SSL vocal compressor, so you may want to set this last or tweak this as you go.
Ratio
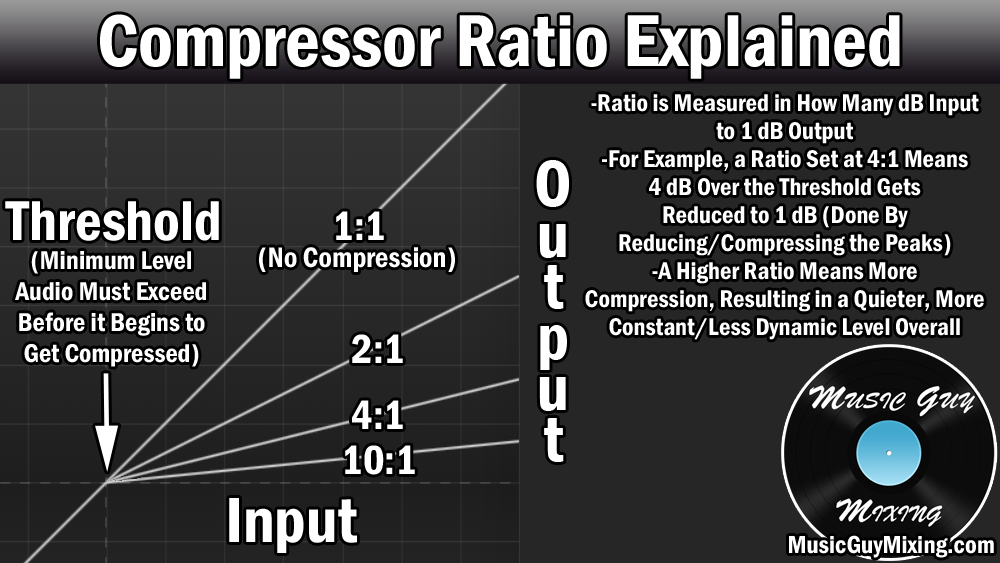
As I always say, the ratio is the main driver of the compressor as this is the degree to which compression occurs. Different SSL strip style compressors don’t offer free movement of the ratio for precision setting, but instead have a small handful of fixed positions.
Depending on your SSL compressor of choice, aim for either a ratio of 8:1 or 10:1 on your SSL vocal compressor.
This is assuming that this compressor is the first in line for handling your vocal’s dynamics in smoothing them out. I mention that because, as I answered when defining how many compressors on vocals you should use, it’s not a bad idea to follow up your initial compressor with a second one.
Termed serial compression, this allows you to treat the already treated peaks with that second compressor to get just a bit more control over the average level, achieving an even more consistent level.
This helps to keep that vocal right in front of the mix at all times without throwing too much work at a single compressor which can leave artifacts or simply not sound as good as the shared efforts.
An opto compressor is always a good choice for following up your initial compressor for a gentle smoothing of the remaining dynamics and peaks.
Attack
The attack on a compressor refers to how quickly the compression engages once the threshold has been met.
Setting this to 1ms on your vocal compression offsets the compression for the briefest of flashes to allow the transient punch of the consonants of your vocal to precede the compression unabated.
This is also important for keeping the vocal up front in the mix; incidentally if you feel like the vocal or any track for that matter isn’t being felt enough despite being at the proper level, check your compressor’s attack as it may be set too fast/short.
If you feel that’s the case here on the vocal compression, push it back to .3ms on the SSL vocal compressor and you should hear more of those “T” and “C” sounds, hard consonants which subconsciously draw the listener to the vocal.
Release
I always liken the compressor’s release to its “off-ramp” – the time it takes after the threshold is no longer met to revert to its uncompressed state or otherwise let go of the audio.
I typically get the best results with the automatic release setting for the most responsive results.
This is especially useful when you’ve got a more complex dynamic track, meaning a track with less clearly defined dynamics which vary from beat to beat as is typically the case with vocals.
Make-Up (Output Gain)
Make-up gain is used to “make up” for the gain reduction which was a product of the compression itself. I mentioned you wanted to aim for around 5-15dB or averaging that out to around 10dB on average of gain reduction. As such, you’ll want to set the make-up setting accordingly, aiming for around 10 decibels.
The way to tell if you’ve set this correctly is to toggle the compressor on and off; the level should roughly sound the same on those loudest parts whether the compressor is on or off. If it’s still too quiet with the compressor on, turn up the output gain a bit more. If it’s louder with the compressor on, turn down the output gain a bit.
Remember that an SSL style compressor also especially works well on the bus which all of your vocals feed into. Check out my guide to vocal bus compression settings to create a little cohesion and glue across all of the vocals playing at once.
Also, don’t forget to check out my complete vocal chain for the exact plugins and settings I like to get my vocals sounding their best in every mix.
SSL Vocal Compression Tips
- An SSL compressor can work well on individual vocal tracks for fast, clean compression to achieve control over their inherent dynamics.
- Set the ratio to 10:1 if this is the first compressor in the chain for an emphasis on keeping the vocal up front.
- Set the attack to 1ms to preserve the transient punch of your vocal (also keeping it up front). If you’re losing some of the initial bite of the consonants, push this back to 3ms.
- Set the release to auto to more responsively react to the complex, changing dynamics of the vocal.
- Set the threshold such that you’re achieving between 5-15 decibels in gain reduction, typically around the quietest (practical) instance of your vocal.
- Set the output gain to make up for the decibels lost in compression so the peaks sound roughly the same volume with or without the compressor on.