
Electric guitar can be used in a number of different ways in your mix. Sometimes it’s a little riff to provide some ear candy, other times it’s the bedrock of the entire track. Let’s talk how to mix electric guitar for all situations.

How to Mix Electric Guitar
Let’s go from the start of the signal chain to the end.
Gain
At the start of the processing chain, you might want to insert a gain plugin to adjust the input level for all subsequent processing. Of course this depends on the level which the electric guitar was recorded.
As I mentioned in my gain staging cheat sheet, many plugins emulate analog hardware.
Part of that emulation is that there’s an ideal level to feed into these plugins to get the best results, or more specifically around a -18dB level on average which peak at -10dB at the most.
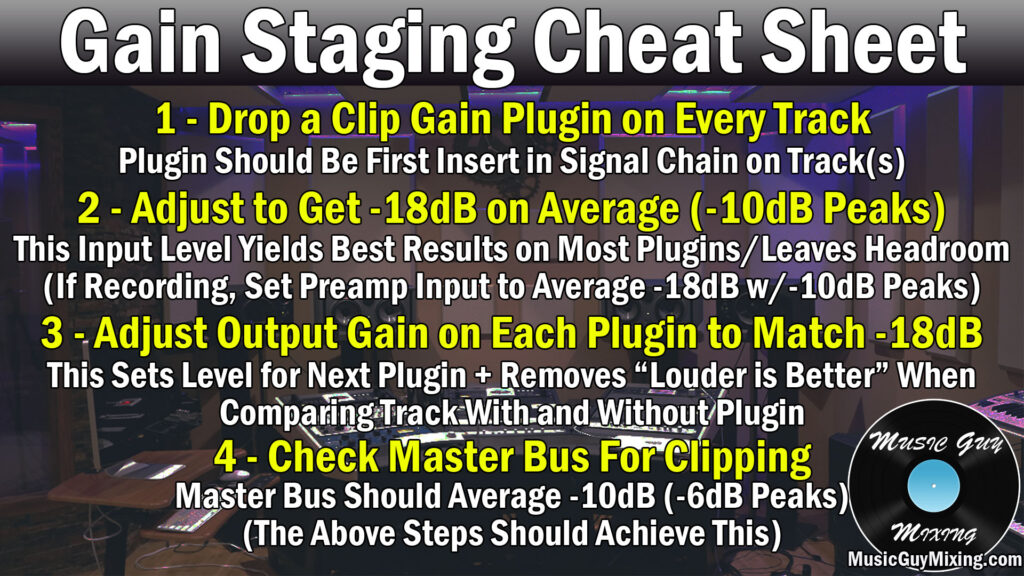
If the electric guitar was recorded too hot, we can use a gain plugin at the start of the chain to turn down the level as necessary.
Panning
The panning of electric guitar depends on a lot of factors. If you’ve got chords, your electric guitar can benefit from being double tracked at which point you’d split one hard left and one hard right. This helps those electric guitar tracks to form a more solid, thicker, and wider bedrock for your track.
Alternatively, if you’ve got a riff type track, some kind of arpeggio, etc. then you might want to set this somewhere between the center and left or right. If you’ve got two tracks like this, you might want to play them against one another on opposite sides of the stereo field:

It’s really all about avoiding frequency conflicts which is one of the keys to achieving a cleaner mix. Try panning your electric guitar opposite other mid heavy instruments in the mix like piano, some synths, or again other guitars.
EQ
A big part of mixing electric guitar is getting the EQ settings just right.
There’s a lot we can cut out via electric guitar EQ to sculpt the perfect tone, and it starts with a generous high pass filter:
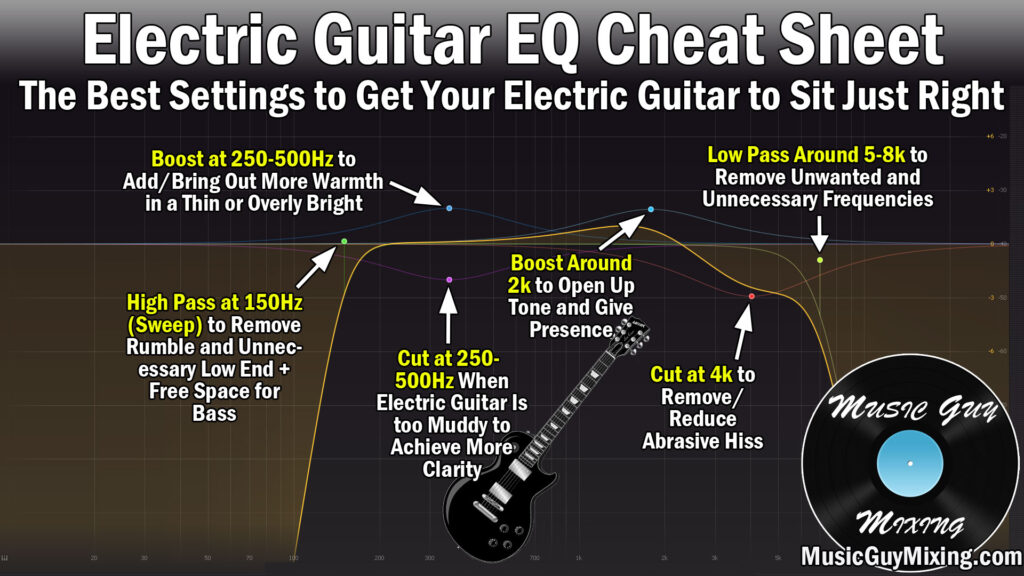
High Pass at 150Hz
As I mentioned in my low end mixing tutorial, part of getting a cleaner low end and mix in general is to clean up space in other tracks for the kick and bass.
By high passing the guitar up to 150Hz (or higher), we let the bass represent the low end of the guitar while the guitar focuses on the mids.
Let’s acknowledge that the low E string on guitar in standard tuning is 82Hz, so admittedly we’re cutting generously into the bottom end of the guitar.
That’s a testament to how well letting the bass and guitar work together works in a good mix. You might be surprised to learn how high the guitar is passed in commercial rock mixes as most of that tone is in the 500-2000Hz.
As such, 150Hz is just a sample starting spot; you can go much higher but listen in the context of the entire mix and make sure the bass is seamlessly picking up that low end.
Cut/Boost at 250-500Hz
Depending on how high you pass, 250-500Hz can be boosted or cut for more or less body, respectively. If you want more warmth, boost. If you want more clarity, cut.
Boost at 2k
For even more clarity, boost at 2k. This opens up the tone and brings presence to the electric guitar. It doesn’t need to be much; as you can see in the cheat sheet above it’s just a boost of 1-2dB.
Cut at 4k
Depending on your tone, a cut at 4k can attenuate any hiss which is attributing to a harsh mix. Try a dynamic EQ cut so that it only attenuates as necessary when the harshness builds up.
Low Pass at 5-8k
Leave the top end for the handful of tracks which need it in vocals, cymbals, and synths. This adds the clarity of your mix, so add a low pass on the top end starting as low as 5k to 8k. There’s generally nothing this high on your electric guitar which you need, so again, prioritize that space for the tracks which will most benefit your mix here.
Output Level
This isn’t as much of an issue with an EQ, but if your output level significantly went up or down after your EQ moves, account for that via the output gain knob to maintain gain staging for our next plugin: compression.
Compression
How much electric guitar compression you’ll need to use will depending on the kind of track it is.
If we’re talking about a riff, a lead, any kind of picked electric guitar part, then you’ll likely want more compression to keep that level steady and track up front.
If it’s any kind of chords whether they be open or power chords, you’ll generally need less compression because there’s not nearly as much dynamic range at play. That said, some compression will always contribute more energy to the track:

Threshold
The threshold on a compressor dictates how much of the peaks or average level of your electric guitar you want to be compressed.
Generally I like the set the threshold to near or just below the average level of my track on electric guitar so I know the peaks will especially get attenuated but the average level will get pulled down, as well. Basically the net result is everything is a little closer together so that we have a more glued together electric guitar, but this also heavily relies on the ratio.
Ratio
The compressor’s ratio determines to what degree that everything above the threshold gets attenuated or turned down.

Generally my ratio I choose for my electric guitar track will be determined by the dynamics of the audio itself. As I mentioned, a picked guitar part is liable to be more dynamic than strummed chords, so I may opt to go (much) higher on the ratio for a riff.
For strummed chords which typically have a small difference between the quietest and loudest parts of a track, I like to go with a relatively light to average ratio of 3:1.
A 3:1 ratio means that if I have a peak which exceeds the threshold I set by 9dB, it will be reduced to a 3dB peak.
I likely won’t have anywhere near that much dynamic range on strummed chords, but this 3:1 ratio set with a threshold around the average volume of the track pulls down any peaks that I do have and creates a little more cohesion and energy in that track. It’s a very subtle but useful benefit.
Conversely, if I have a lead guitar part, then I generally want this to be up front and I’ll treat it more like a vocal. In this case I might go as high as an 8:1 ratio and experiment with the threshold to include most if not all of the signal.
This crushes the dynamic range, but for the sake of keeping that lead guitar up front in the mix as there’s no drop-off in the level.
Set your compressor knee to -6 to -12 dB which is relatively hard but will begin to compress the signal a little as it approaches the threshold, providing a little extra glue and a more transparent compression.
Again, you’ll want to set the threshold and ratio alongside one another, and it will depend on the type of electric guitar to find the right balance for your situation.
Attack
The compressor attack determines how quickly the compression engages when the level exceeds the threshold. Set the attack to be too low/fast and you snuff out the transients. I like to generally aim around 5ms of attack to allow the peak to “bite” through the mix for that split second.
This adds punch to the mix and keeps that track asserting itself within the context of the mix, not to mention it livens the track up as you get to feel that compression working.
Release
The compressor release determines how long after the level drops below the threshold that the compression takes to disengage. A little release keeps the track sounding natural. Too little/instant of a release and you’ll hear the guitar level snapping back and forth abruptly.
50ms of release time provides a natural off ramp for the compression, keeping the track sounding natural while still realizing the benefits of the compressor.
Output
The output knob on the compressor is much more important than the EQ because compression is all about reducing peaks and with them volume.
To keep our gain staging intact, not to mention the track balanced in the context of the mix, you’ll need to add some output gain. Set it so that when you turn the compressor on and off the perceived volume is the same.
Imaging/Width
This applies more to single electric guitars like leads which are kept in or near the center, but sometimes you want more width and stereo presence in your guitar track via stereo imaging, especially if it’s carrying the song in that moment as in the case of a lead.
In this case, try adding an imaging plugin like Ozone’s free Imager.

This allows you to boost a track’s width in the stereo field, and in the case of Imager, you can specify certain frequency bands to add width to while leaving the low end untouched.
I like to add a little width around 800-5k and even more on the top end of 6k and above as you can see from the image above.
Other Processing
Typically with electric guitar you’ve already dialed in the tone you want on the front end when you record.
Outside of very specific aesthetic effects which will only be applicable to whatever vision you have for your track, spring reverb is a classic type of reverb which is most commonly applied to guitars.
Due to its bright and clean tone, it almost works and sounds like a delay and can be just the finishing touch you need to give your electric guitar the presence you’re looking for.
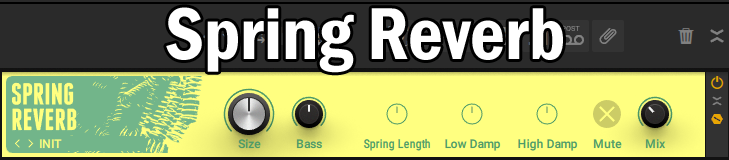
A little bit can be applied to chords, whereas you can dial up more to plucked/picked parts to give them a little more presence and sustain on that tail end.
You can also keep things even simpler, just blending in some of the room reverbs you might already have on aux/return tracks in your mix as a send.
This is nice because it’s easy because it’s already there, allows you to blend in as much or little size and depth to your guitar, and adds more mix cohesion to that track as it gives the guitar the effect that it was recorded in the same space as the vocals and anything else you’ve applied that/those reverb(s) to, even imparting a kind of natural live feel to it all.
Again, you probably want to use less of this on chords and more on plucked or picked parts, but try experimenting with this to see if it’s all you need for that finishing touch in how to mix electric guitar. As always with reverbs, especially those you’re applying to multiple tracks as sends, make sure you’re using that Abbey Road Reverb trick and filtering out everything below 600Hz and above 6k via EQ filters to keep it clean.
