
Reverb is a beautiful thing. It allows you to create depth when there was none inherently in the audio itself you recorded. Used on an aux/return track (see sends vs inserts), it’s great for creating one or two room style reverbs for your entire mix, allowing you to blend in different amounts of this effect on your tracks at will, giving them all a sense of cohesion of being recorded in the same space. The dark side of reverb is just that – how quickly it can clog up your low end and create a muddy mix if you’re not careful. This is why EQing reverb is a necessity every time. Let’s talk how to EQ reverb to keep your reverb clean.
How to EQ Reverb
The first thing to mention is that you can’t (easily) EQ reverb when it’s used as a simple insert, like on your vocal chain.
As I mentioned in opening, it’s typically best to use reverb as a send so that you can blend a specific amount in with the dry version of your track. This saves mixing CPU, is faster/easier, and gives your mix a sense of cohesion via that reverb(s).
The only exception is when are going for a very specific effect you’re only going to be using on that one track, but at that point you probably aren’t going to be concerned with EQing your reverb.
Note that you CAN EQ your reverb via an insert in your effects chain for a track, you’d need to create a group for that effect (or the non Ableton Live equivalent in your DAW), essentially creating two tracks on that one – a dry version and the reverbed version. It’s basically the same thing as using the reverb on an aux/return track but just for that one track, so there’s not much point in that.
If you don’t do this, the EQ you put following your reverb will just end up EQing your entire track, not just the reverb.
But I digress!
Basically to EQ your reverb, simply drop the reverb on an aux/return track and put an EQ right after it.
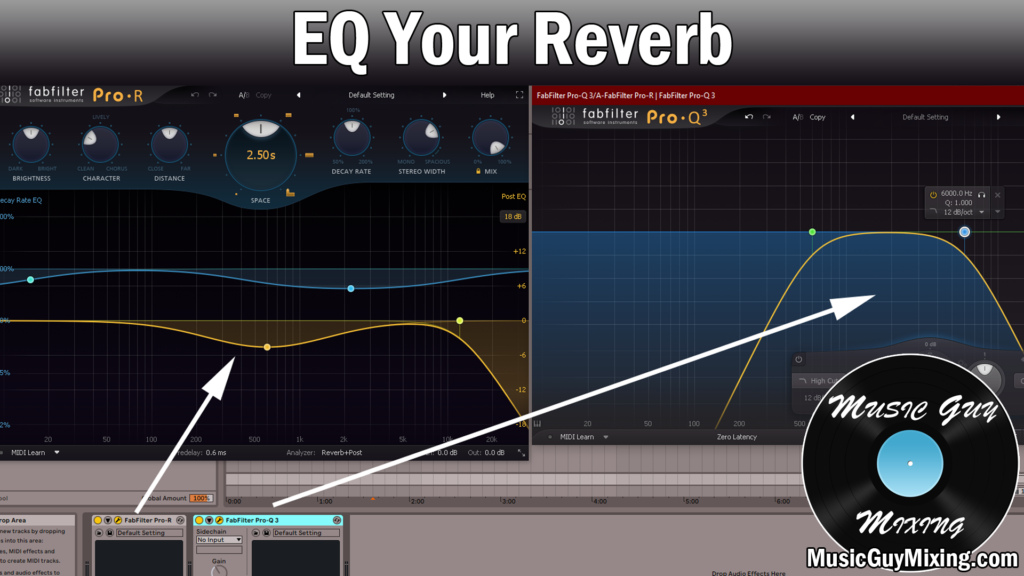
Note that some reverbs like my go-to, the FabFilter Pro-R, has an EQ right on the plugin. Along with the brightness/character/distance settings, this lets you sculpt your reverb as a whole along with its tail.
I still prefer to follow it up with an EQ separate of the one on board of the plugin itself as I find it gives me more control over the finished product.
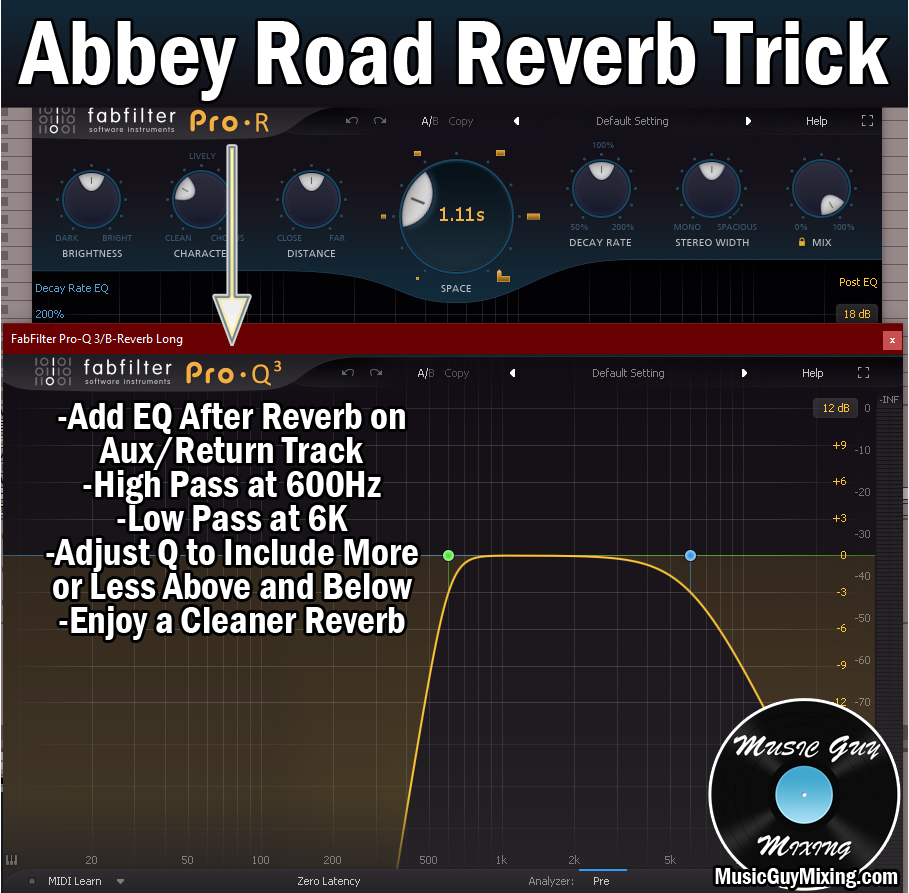
Getting back to how to EQ reverb, one of the most reliable methods is to use the Abbey Road Reverb Trick.
This is a technique used by the engineers who worked on the music of The Beatles at the titular Abbey Road Studios in the 60’s.
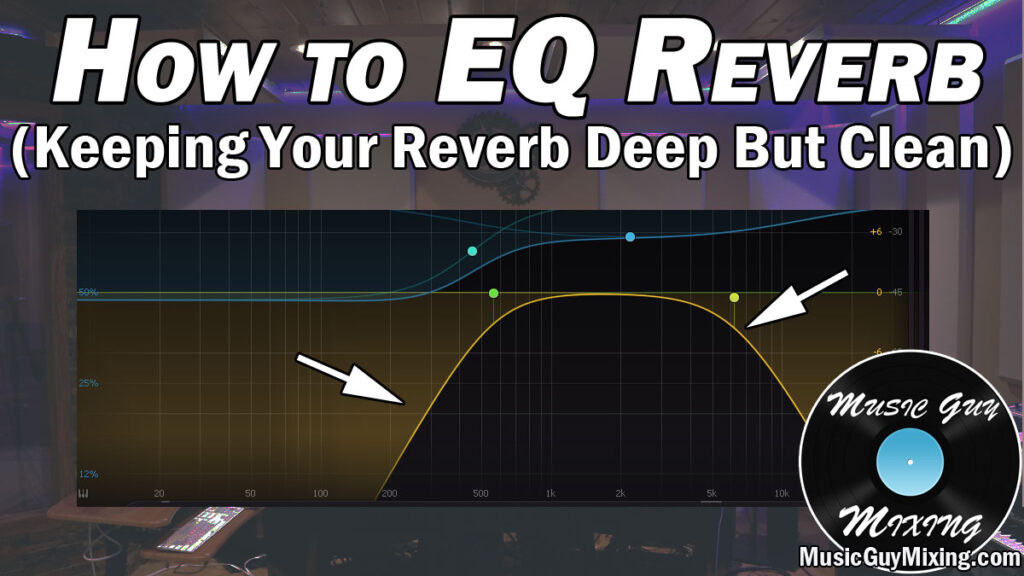
It’s still used today because of its knack for keeping the reverb confined with two simple filters, a high and a low pass.
High pass at 600Hz and low pass at 6k as shown below:
Honestly the slope on these filters could be softer, but it gets the point across.
High passing at 600Hz cleans up the lowest frequencies which don’t benefit as much from the reverb. More than that, the reflections below this point add mud which makes your mix sound more claustrophobic than open.
Everything above 6k also is left untouched via the low pass filter, keeping the high end sizzle and transients up close. This helps those tracks cut through the mix while you still get the benefits of the reverb in the meat of the track(s).
Note that you don’t have to limit this trick to your reverb. This works well on delays, chorus, etc.
Anytime one of your sends in the spacial/width/depth/modulation category (see my overview explaining all audio effects) isn’t sitting quite right, employ this trick to get it more laser focused in your mix.
Lastly, you don’t have to limit the filters on your reverb EQ to a strict 600Hz and 6k. This is a great starting point which oftentimes works, but if you’ve got a sparser mix, you might try widening this out on either side as you have more room in your mix to include less of the filtered reverb.
Wherever you cut with EQ, make sure that you do to keep your mix clean while maintaining the benefits of the reverb in the mid and upper mid range.
